Pages

Wednesday, 20 May 2015

My Essential/Favourite/Can't Live Without Kit Products:


So this is just a few products that I love, can't live without. These are products that I always seem to use personally and products that I turn to for the majority of my makeovers. Apologies about the limited range of brands, these are just products that I have used and loved, but I do need to branch out and try other brands. You can probably also tell that I love warm neutral colours, I know I need to be brave and venture out into the world of colour.
  1. Smashbox Luminizing Primer: This primer just gives a sheer golden radiance to the skin which I love. I also like to use it if someone is wearing false tan as the golden glow works great paired with a tan. This primer is also great when away in the sun and worn underneath a BB or CC Cream.
  2. MAC Strobe Cream: This is a wonder cream, it instantly hydrates and brightens skin. It works great on dry, dehydrated, tired or dull skin as it quickly boost moisture and radiance.
  3. Smashbox Primer Water: So this is one of my most recent additions to my kit and I've been using it everyday since. Use it under make as a super sheer and light primer, it can also be used on top of powder to set your look for the day and throughout for an instant hydration boost. You and others will notice the difference it makes, skin looks healthy and glowing.
  4. Inglot Duraline: This product is the best friend of winged liner and make-up artists. It is a mixing medium which can be used with gel liners to make them more fluid or with pigments to create your own liner or use it on its own with a clean angle brush to sharpen or fix a winged liner. 
  5.  Inglot AMC Gel Liner 77: Definitely my favourite gel eye liner, the pigment is super intense and long wearing. This is the perfect winged liner product. The colour pay off is instant and doesn't budge or crease.
  6.  MAC Warm Neutral Palette: This palette is a must have for anyone who loves a natural smokey eye. It contains 15 warm eyeshadow shades perfect for creating a range of looks but I think it is super suited to bridal looks which tend to be a little softer and romantic.
  7.  Smashbox Suntan Matte Bronzer: My perfect matte bronzer, use it to warm the skin, add colour or use for a soft contour. The colour is completely matte and the powder is super light and easily buildable. But sadly it has been discontinued as it has been replaced and I am looking to trying the newer version.
  8. MAC Paint Pots: These paint pots are great on there own blended out for a quick simple eye look, or use underneath as a base and to increase depth for a more dramatic look. I personally love Groundwork which is a warm taupe, it is a great base for a smokey eye. A few other choice colours are Indianwood, Painterly and Soft Ochre.
  9.  Smashbox Halo Highlighting Wand Gold: This is a light weight fluid highlighter which is a humectant so it keeps the skin hydrated as it attracts moisture to the skin. I use under foundation and apply across the cheeks bones, centre of forehead, chin and nose to give a super dewy glow to skin.
 10.  Anastasia Beverly Hills Dipbrow Pomade: This is the best brow product I have used. It is waterproof and doesn't smudge, the colour is rich and intense,a little goes a long way. Use it with a small fine angle brush to shape and define brows. It works on both full and sparse brows. I used to think I couldn't live without mascara but now I can't live without brows, specifically this product.
So I hope you liked the insight into a few of my most essential and everday products, but I do hope to try some new products in the near future, funds permitting. 
Lot of Love
A
x

Monday, 18 May 2015

Current Playlist: May Edit

It's 11pm on a Monday, I am watching Crossroads (I have a serious love for Brit Brit) and eating Jelly and Ice-cream. The perfect timing for another blog post!


So doing your makeup and hair for any occasion can be quite tedious and time consuming sometimes I like to watch YouTube videos but I can get too distracted so instead I love to rustle up a good play list and jam out while getting ready.....hairbrush for a mic....we've all done it don't lie. I though sharing my current play list might be interesting because it's very easy to listen to the same boring songs over and over again. So here's a list of all the songs I have been loving at the moment...some current tunes and some serious throwbacks...

Pretty Girls - Britney Spears Ft. Iggy Azalea (My love for Britney runs deep)


Still Into You - Paramore


Nobody Love - Tori Kelly (One to watch out for..she's gonna be huge!)


Candyman - Christina Aguilera (An oldy but a goody)

Jealous - Nick Jonas (Wouldn't kick him out of the bed for eating crisps!)

Where Are You Now - Skrillex & Diplo Ft. Justin Bieber
(Don't knock it till you hear it....)


Bad Blood - Taylor Swift

Let me know in the comments if you enjoyed this post and I can do one up again next month!
Love,
S x

Friday, 15 May 2015

Confessions Of A MakeUp Artist

HAPPY FRIDAY!

Today I am bringing you a post all about the boring but essential tasks that a MUA must do to be on their A game so let's talk a little about hygiene. It sounds very silly to say but hygiene is so important when your a freelance MUA and sometimes can make or break a clients experience. I want to share some of my key points when it comes to hygiene! If you have any you'd like to add sure drop a comment a below and share.


  • Brushes. Your tools are your best friend and for every client your brushes MUST be spotless. I have gotten myself into a really good habit of cleaning my brushes straight after each makeover. If you have one makeover after another and cannot give your brushes a good deep clean a good sanitising brush cleanser is essential and will be a life saver!
  • Hand. Sanitise sanitise sanitise. You can never clean your hands too much when on a makeup job. I like to keep my hand sanitiser right beside me when working so if you touch your hair or cough etc you can sanitise right then and there. It's also important for the client to see you cleaning your hands before going anywhere near her face, sending the right signals is essentials. 
  • Use a spatula and palette. When investing in kit and spending a fortune on different products it is so important to keep them clean and prevent cross contamination. And by that I mean...NEVER using a concealer wand directly on a clients face, always apply it to the back of your sanitised hand or a palette first and then use a brush. And that way if your client has a blemish, cold sore or an eye infection your not going to pass it along to your next client. You can do this similarly with foundation, lipstick, eye liners etc. 
  • Disposables. Similar to the point above always use disposables when applying mascara or brow gel to prevent cross contamination. You can pick them up super duper cheap in a beauty supply store. 
  • Keeping your kit clean and tidy. A good MUA is nothing without their kit and keeping it clean is a MUST. I like to organise my kit after every use to make sure its clean and tidy for the next client. By this I mean cleaning your actual products, for powder products you can use a tissue or a cleaning spray like "Beauty So Clean"  to remove any dirt, dust or excess product. Using surgical spirits or alcohol to sanitise lipsticks and sharpening pencils. It is also super important to keep track of use by dates on products and throwing away any that may be out of date specifically mascaras. 
  • No double dipping.....EVER.
So there is some of my essential tips and I guarantee if you get yourself into a good routine now it will feel second nature in no time, not to mention having a sparkling kit every time you visit a client. 
Hopefully you found something useful in this post and I would love to hear your feedback in the comments below!

Love, 
S x

Wednesday, 13 May 2015

The Big Day: I Do & I Dont's


Your wedding day is approaching so here is a few dos and dont's from me, to help you prepare and know what to expect when it comes to getting beautified before you say I do.

Skincare:

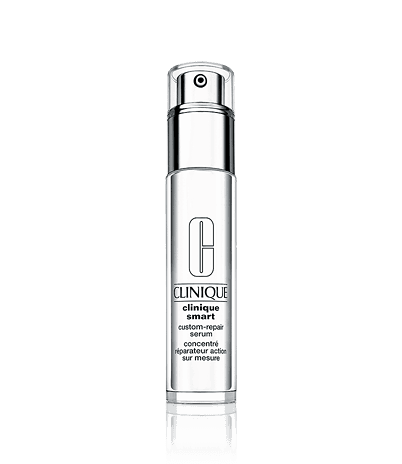
Please do not admit that your skincare routine consists of a make-up wipe, if it does get yourself down to your nearest chemist or beauty counter. Don't be afraid to talk to a consultant and find out which products best suit your skin. Personally I am a huge fan of Clinique products as they are all allergy tested and fragrance free, Clinique Smart Serum works wonders, if you want to a radiant glowing bride.


Trial:

I would always recommend a Bridal Trial as a must because everyone has they're own interpretations of natural make-up or a smokey eye. If you will be wearing false tan on your wedding day, it's a good idea to a tan trial if possible therefore your make-up artist can be fully prepared to match your foundation.

Make-Up:

Your make-up for the day should be a perfected version of you, your wedding day isn't the day to try a new look. If you have never worn eyeliner or a red lip you probably won't feel comfortable on the big day and looking back on pictures might regret your choice.

Bridesmaids:

Your bridesmaids should be prepared to do whatever you ask of them, after all it is your big day. They shouldn't refuse to wear the look you chose, request different make-up or go and alter the make-up after. So just be sure inform them of the look and what you say goes.


Timing:
 Allow extra time. You might be the most organised bride ever but be sure to allow extra time because you cannot be prepared for everything and something is bound to be forgotten or mislaid and more often than not someone will be late. Book Hair and Make-Up at the same time, if needs be they can work simultaneously or alternate between them.


Photography:

Allowing extra time will also give your photographer a chance to take some candid shots of you in the preparation stages and he or she might also have time pose some shots. Also be mindful of the rooms or area you are being photographed as these will be in the background of your wedding images.

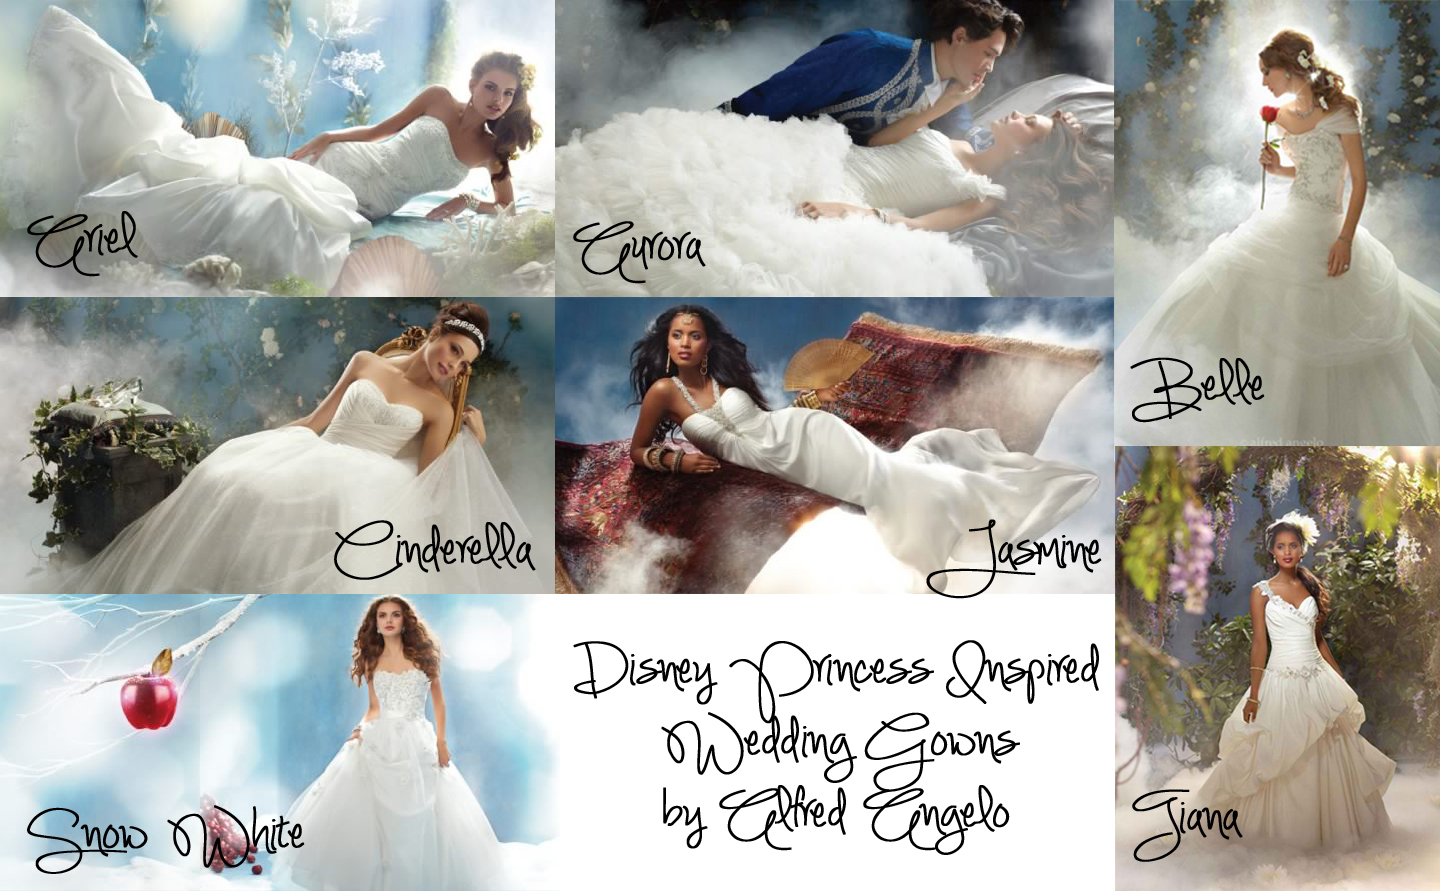
If you're reading this in preparation for big day, I hope you have an amazing day and feel like the princess you dreamed of being as a child.


Same time next week!

Lots of Love,
A


Monday, 11 May 2015

Foundation Fact File.

Guess who has coffee and a full post's worth of make up chatter to get through? Yeah. Me. You guessed it. 

This week we're having a chinwag about foundation. Years of doing make up, and a few extra years of doing my own make up, have taught me that your foundation can make or break your look. It's also the major point of stipulation when it comes to a lot of make overs. Owing to the great passion that people have for their war paint I decided to do up a little guideline for those of you who are a bit lost when it comes to buying a foundation. 

I'll go through some common make up jargon (i.e the words that'll no doubt be hurled at you at some point when you're in store having a wander) and break them down so that the next time you need to invest the process won't be so daunting. 

Undertone; The undertone of a foundation is grouped as either warm, neutral or cool. "Warm" foundations have more yellow pigment in them, and "cool" toned products have more pink pigment. "Neutral", naturally enough, is somewhere in the middle. 
The undertone is usually the first hurdle that knocks people down. Some bases have more prominent pigments than others. As a rule of thumb, if the foundation looks grey or washed out you should try something warmer. If your foundation is coming across too yellow, or even orange, try something with a more neutral or cool tone. 

Formula; The formula is basically the way the product looks in the packaging, i.e liquid, powder, cream, etc. Different formulas have different benefits and strong points. For example a powder foundation is ideal for an oily skin type as it will absorb excess oil while you wear it. A richer liquid or cream product will be best for a drier skin as it will add a healthy sheen to the skin. 
Do a little research into the products you like the look of, as not all formulas stick to straight forward rules. There are some liquid foundations that work amazingly on oily skin and some powders that work nicely on dry skin. It all depends on the finish, which we'll cover next. 

Finish; When we talk about the "finish" of a foundation we mean how it looks on the skin. Matte, dewy and satin are all finishes. The finish isn't always determined by the formula, so as I said definitely do a little inside snooping to find out about some attractive products. 
A matte finish has no shine to it and gives a soft, powdered look to the skin. A lot of oily skin types like to go for this finish as many matte formulas will absorb excess oil and reduce unwanted shine. On the flip side we have drier skinned folk who like to add some faux glow. They might opt for a dewy finish which leaves the skin looking fresh with a sheen to it. Have a play with some foundations, ask some questions and see what takes your fancy!

Coverage; Oh, the Irish ladies are big into their coverage! Whether they like a light and sheer base or they want full on foundation, the Irish cailíns know their stuff! This is the one area that the Irish public has definitely educated themselves on, and brilliantly so. 
The coverage of a foundation determines how opaque the product is. Full coverage will completely obliterate your natural skin tone and replace it with your base colour. Medium coverage will show some texture and natural colour. Light coverage will show your skin and let it shine through while evening out the skin tone. 
One thing to consider here is whether or not you actually need a lot of coverage. One or two hormonal spots on your chin won't warrant a blanket of base across the gorgeous clear skin along your cheeks. Consider pairing your foundation with a concealer. Examine how your skin changes and behaves and let that help you in picking your foundation. 

So, armed with this knowledge, I hope that you guys and dolls have a little bit more confidence when it comes to picking out your new holy grail product. Buying a foundation can be one of the most influential purchases of your entire make up wardrobe, so I'm aiming to make it a little easier.There's a lot more that goes into creating the perfect foundation but with these four points under your belt you'll be fresh faced and fancy free in no time!

Don't forget to also follow us on twitter and Instagram, both of those are linked at the top of the home page. If you want us to see any of your posts tag us and hashtag "#ThreesCompanyBeauty"

I hope this was helpful guys!
Until next time,
J x 


Friday, 8 May 2015

Pale Girl Problems: Contour

Hey ladies,

I hope everyone is well and looking forward to the weekend and if the weather is to be believed its going to be a washout! But alas, the summer weather is on the way and today's post is vital if your a pale girl wanting to get that chiseled contoured look that is literally everywhere at the moment. Most bronzers that are on the market at the moment are aimed towards people who can carry off a tan...so where does that leave us pale girls? Don't worry Suzie Q has got you covered and I am going to let you in on my secret weapon!


After many failed attempts I finally found the perfect contour shade NYX Powder Blush in Taupe. It differs to most contours as it has a grey tone instead of a warm bronze. It makes contouring look way more natural on paler skin tones and gives the face a defined shape. I pair mine with a Real Techniques Contour Brush and apply it under my cheekbones, up to my temple and around to my hair line. I often avoid putting it under my jawline purely because its hard enough finding a foundation that matches my skin tone so I don't want to have a line between my neck and face.

The best part is that it is the cheapest of all the bronzer/contour products I have tried thus far at €7.49...result! You can find it at your local NYX stand which are slowly becoming more widely available through out Ireland or online on SamMcCauley.com and LittlewoodsIreland.ie!

Keep your eyes peeled over the next week as I'll be bringing you reviews on more products for paler skin tones so make sure you hit the follow button on Bloglovin. If your looking for something in particular hit us up on twitter @ThreesCompanyBB or tweet me directly @WhatsNewSuzieQ.


Until next time!
Love, S x

Monday, 4 May 2015

The Essentials; The Brush Edition.

Monday? Check. Coffee? Check. Decaf at this hour, naturally. Another post? Check. We're in business.

Susan took up my usual haunt last Monday and did so beautifully, but I'm back this week with a post on some of my favourite brushes. These are the brushes I call on in any given situation, and the ones I think that you guys seriously need to invest in! Good brushes make all the difference when it comes to applying your war paint. 

It's a Bank Holiday Monday night so I'll keep this on the side of "Light Reading" and group these bad boys by Eyes, Skin and Lips. If anyone would like a more in depth review, just let me know and I'll throw together a lil' somethin'! For now, let's get cracking.


Eyes.


(brushes listed L-R)

Eco Tools Concealer Brush: A stiff, flat synthetic brush. Perfect for applying cream shadow. I also use this for under eye concealer, but I much prefer it for work on the eyelid.

Inglot 31T Brush: The very last word in angled brushes as far as I'm concerned. Razor thin and super precise, I love this for winged liner or for brows. The brush is flexible enough to create a soft, natural brow if needs be. 

Real Techniques Base Shadow Brush: An ideal brush to apply eye primer with. This blends cream or powder gorgeously. The brush won't absorb fluid products, making it perfect for cream products.

MAC 239: A flat brush made of goats hair. This is brilliant for packing shadow onto the eye with the best payoff. I also like this for shadow underneath the eye, as the top of the brush is thin and dense.

Inglot 6SS: A large blending brush for applying a light wash of colour, perfect for applying a contour shade into the crease. I start almost all of my eye looks with this brush to determine the space I'm working with. The 6SS is made of natural hair, so it's best for powder shadows.

MAC 217: The cult favourite. A small, oval shaped blending brush. The 217 can be used for larger areas or to add specific definition. Again this is better with powders in my experience as it is white goat's hair and can stain. I've used some popular alternatives for this brush but keep coming back to the 217.

CrownBrush C224: An oval shaped concealer brush. This is my go to brush for under eye concealer as it's dense enough to blend the product without reducing the coverage. The C224 is a basic brush I think every one should have, no one won't benefit form owning this guy.

Inglot 10S: A long, thin blending brush. This is perfect for smudging out eye liner or defining underneath the eyes as its shape keeps it really precise. I use this to create a really soft inner corner highlight as well. 

Skin.


(brushes listed L-R)

CrownBrush C435: A large, soft, angled brush. This brush blends powder bronzer over the face and neck quickly and easily without adding too much product. Plus it feels amazing on the skin!

CrownBrush C426: A huge duo-fibre brush with a domed head. I absolutely love this brush for blending powder products down onto the neck. If I have a client with a tan that doesn't quite match a shade in my kit I prefer to use a powder bronzer or foundation to match the neck as these are less likely to transfer onto clothes. This brush blends these products really softly for the most natural finish.

CrownBrush C466: A classic flat foundation brush. This is synthethic but incredibly soft. I get no streaky lines when I apply liquid products with this brush. Being totally honest, I was never a fan of this type of brush until I picked this one up. I now own three. That's how fabulous this is. 

CrownBrush C427: A smaller version of the C426, and more dense. You can be a lot more precise with this brush, I love this for applying a contour product with. Being duo fibre it works equally well with powders and creams. I own a couple of these as they work well for blush so I may use more than one at a time. 

Inglot 4SS: A large blending brush. This brush is so soft that I look for reasons to use this, just to feel it on my face! It's best for applying product in a specific area. I find this a little bit small for blush but I love it for specific contour or highlight placement. Despite being natural hair it works quite well with creams. 

Real Techniques Buffing Brush: If I'm in a rush, I pull out this guy. It blends product into the skin for a gorgeous natural finish. I use this with MAC Studio Fix Powder for easy coverage and even skin when I roll out of bed 25 minutes late. This is a Godsend. 


Lips.


(brushes listed L-R)

CrownBrush C463: An angled brush that's perfect for getting crisp lip lines. I love this for defining the outside of the cupid's bow. The edge is flat as opposed to curved so it does half of the work for you. 

Real Techniques Accent Brush: The tip of this brush is rounded, so I do love this for defining the curved bow of the lip. This is irreplaceable for me when it comes to doing dark, precise lip colours. I know this is marketed as an eye brush, but for me it's lips all the way. 

Face2 304 Lip Brush: I picked this brush up out of need rather than interest to be honest, but I ended up loving it. The brush is flexible enough to blend lip liner and lipstick together without losing control of the product. I also love this for touch ups. Once I have my shape defined, this brush fills the space really easily. 


I could go on from here, but I'll leave it at that. It's safe to say that these have become tools of my trade. If any of these become discontinued I'll have to hang up my brush belt for good! If you like the look of anything you see above, I've included links to some online shops below:

To purchase any of the CrownBrush items you can visit their online shop here.
MAC and Inglot brushes can be purchased from theie respective retail locations around Ireland. Inglot Ireland have an online shop, for their brushes you can click here. 
Real Techniques And Eco Tools retail in Boots in Ireland and can be purchased from the Boots website here. 
Face2 retail through Makeup Forever on Clarendon Street, Dublin. To purchase the Face2 Lip Brush through the Makeup Forever website, click here.

With all of that said, I'll leave it right there. As always, get in touch on our other social media locations. All of those are linked at the top of the blog. Blah,blah, blah, shameless plug and traffic driving through different platforms, you know the story by now...

Good night and God bless!
J x 


Template by BloggerCandy.com | Header Image by Freepik