Pages

Showing posts with label make up bloggers. Show all posts

Friday, 31 July 2015

Colour Correcting; The even better solution to fabulous skin.

Hola compadrés!

Apologies for the delay in my post this week, I can only imagine the devastation the delay caused. I have returned at the opposite end of the week to bring you more tips and tricks. As per usual real life decided to park itself right in the middle of my routine. Honest to God, the cheek.

Anyway! My skin has been a bit unruly as of late, so I've taken to using an old school green corrector under my foundation to tackle the high colouring around some choice "activity". I haven't used a correcting product in ages, so naturally the novelty kicked in and I had to have a go of everything; the under-eye blackness, the blemishes, and a little bit of brightening primer for the whole shooting galley. I lost the run of myself entirely.

I've since calmed down and gone back to a more moderate routine that lets me out the door at a reasonable time in the morning. Today I've brought a little bit of information with me about correcting products and what they do. I'll be sharing this info with you ('cause I'm nice, see) and talking about how to use different products for different problems. If needs be then now would be the time to grab a cuppa/snack/put the child to bed before we move on.


The whole theory behind colour correcting is that opposite colours on the colour wheel will cancel each other out. Products with specific tones in them will even the look of the skin once foundation is applied on top, helping to conceal really stubborn colour issues. There are different colours for different problems, but we'll get into that a little bit later on. The general rule with this technique is that the deeper your skin tone is, the more intense the colour of your corrector should be.
It can all be a little bit complicated if it's new to you. Chances are that either the packaging or a consultant will inform you as to what each product does, so take your time when picking out one for yourself if you think you'd like to try it out. 

Colour correctors usually come in two forms, one being a densely pigmented cream product. These are used for specific areas of discolouration on the skin. These usually include heavy under eye circles and redness or red blemishes. These creamy products are applied to the area and your foundation is applied on top. They're best applied only to the offending colour, as if they bleed onto any areas of clear skin the colour can show through your base. 

The second kind of product is a sheer primer to be applied all over the face. A product like this will counteract more widespread discolouration. These have less colour in them and are used to even out a difference in skin tone rather than specific problems. Redness is one that crops up here a lot, but also sallow complections and dull, tired skin benefit from these bad boys. Again, both formulas come in different colours to take care of different things. The general, run of the mill colours that crop up again and again will be broken down for you below. 

Green: As far as I've seen this is by and large the most common colour marketed to the public. It's also very easy to use this wrong, although I kind of feel like that's not always the consumer's fault. Green tones will cancel out excess redness, be it widespread or localised. These come in either a concentrated corrector or a fluid base depending on what your skin needs.
Green can be notoriously difficult to hide with a foundation, so using a softer green tone is definitely more advisable. Less intense redness could get away with a yellow toned primer, and it'll be far easier to cover.

Peach/Pink: Either a soft peach or a rosy pink will cancel out blue tones in the skin. Sometimes these guys go unnoticed because they're often sold as concealers for the under eye area rather than dedicated correctors. That being said they're most suited to that area as they combat the cool tone in under eye darkness. For paler skin, try a more pink tone. For medium skin tones a warm peach will be fine. If you have a deeper skin tone then something more orange-peach will work better for you. 
If you find a primer with this tone to it (Smashbox do a fantastic one) then you can use it to brighten dull skin. Darker ladies will see a renewed glow to their skin if a warm base is applied under foundation. 

Yellow: This is for covering bruising or scar tissue with a purple hue to a it. Yellow creams are fantastic for hiding stubborn purple discolouration, especially those found in healing surface injuries. An eye primer with a yellow tone to it can help to disguise visible veins under the thin skin on the eyelid. That much has been learned from experience!
A sheer base with a yellow tint to it will liven up tired skin on the paler end of the spectrum, or kick start a warmer skin tone and give it an extra lit-from-within kind of radiance. 

Lilac: So we know that yellow will cancel out purple, so a purple will cancel out... Yup. Sallowness, or excessive yellow tones in the skin. 
Purple creams can be used to correct brown age spots in pale skin, disguise old bruising or any other discolouration with a visibly warm hue to it. I wouldn't use this colour on warmer or black skin as it'll show up as ashy and grey. Us white walkers can pull this off, though. 
Lilac toned base products will revive cooler skin tones and add back a porcelain glow. The palest of pink tones will love the effect this has one waking up your skin. Just don't go too purple, anyone remember that scene with Edward Scissorhands and the Avon lady? Yeah. That can actually happen. 

Beyond those listed above there are a multitude of colours that aim to conceal and correct something or other. Take your time picking out one for you, and keep in mind the four basic colours above. Any other variations will generally stem from one of the problem solvers we discussed mere moments ago. 

Colour correcting can be a fantastic weapon in your beauty arsenal but if you're still a bit iffy, feel free to contact a make up artist and book an appointment. Let them know what it is you're looking to learn and achieve, I've no doubt they'll be more than happy to give you a dig out.

As always, any queries or questions are more than welcome! You know where to find us.

Until next time,
J x 


Monday, 20 July 2015

Cream Eyeshadow; how it can brighten, tighten, and lock in your look.

Good evening!

Even lifting my body off of my bed to sit down in front of my laptop and type this post is working out to be a whole lot more effort than it should. That tells you exactly the kind of day I'm having. So naturally I'm doing things the easy way today. Lazy, much?

Today's post is inspired by the amount of activity I've been doing for most of the day, i.e as little as is necessary. If you read my latest post (and why wouldn't you? Shame...) then you know that MAC's Painterly paint pot is my go to eye base. It's basically a cream eye shadow that matches my skin tone. But there are other cream products in a variety of colours that you can use to create almost any eye look. These products make doing your make up quick, easy and foolproof with minimal effort. No prizes for guessing why I love them. Intrigued? Thought so. Let me break it down.


To start with, there are two kinds of cream products for the eyes; ones that set in place to last longer and ones that stay creamy. The ones that set in place can be used alone for a quick application of colour to the eye, or they can be used as an eye shadow base. The colour and texture you use will determine how the eye make up will look overall. You can use designated products like paints pots, or even gel liners. I find Anastasia Beverly Hills' "Dipbrow" to be a brilliant cream shadow as well. These all dry to last throughout the day.

Using a cream eye shadow that matches your own skin tone will simply keep the colours on longer and make them easier to blend. It'll make the colour a little more vibrant but overall they should look the same as in the pan. Using a bright base will make vivid colours appear more intense. Using a darker coloured primer will make the eye make up appear more smokey and dramatic. If you use a particular tone or colour similar to powder shadows applied on top then you'll amp up the drama and make them more vibrant! 

Example; MAC "Deeply Dashing" pressed pigment applied alone, then over "Painterly" Paint Pot and finally on top of  "Pomegranate" Colour Tattoo by Maybeline. The darker red base brings out the warmth in Deeply Dashing, changing the tone of the product.

The second kind of product, the one that stays creamy, can be a multitude of things. You can use coloured face paint, concealers, eye liner pencils, and tons more. These products tend not to last as long and definitely need to be set in place with a powder product in a similar colour. You do have much more choice of colour, though. I'd stay away from lipsticks, lip liners and cream blushes as some of the red pigments can irritate the eyes. The most popular choice for this option is pencil eye liners. They're waxy and smooth and often quite easy to blend. This option is more suited to photographic or fashion make up looks, as it won't last all day on most people. 

Cream colours are essential for many make up artists and they're a fab little technique to add to your make up routine to make day to day beautifying that little bit easier. Whether you want to add a brightened effect to your eyes (that's me of an early morning shift) or you want something more dramatic and smokey then a cream shadow will work wonders for you. 

If you decide to experiment with some more colourful products and take a step outside your own comfort zone then definitely show me! You know where to find me, as always links are at the top of the blog. 

As for me, I'm cleaning up after myself and diving into bed. Don't judge, the evenings are already getting shorter. Say nothing'! 

Until next time!
J x 

Wednesday, 1 July 2015

A lesson in etiquette.

Ok, lovelies!

Buckle your belts, I'm back in a not so usual slot this week. As I mentioned in my last post I'd had some time away from work. I'm now back into the swing of things, and quite happy about it. I want to preface this post by saying that I do actually love my job (beauty consultant, for those who don't know. That's corporate speak for "counter bitch with a brush belt") but there's one aspect in particular that I want to talk about.

Since the middle of last week I've been jack-knifed from a life of leisure to a world of work and the one thing dulling the shine for me is how people behave at a make up counter. I'm not going into any details regarding specific situations but rest assured, my sleep-addled brain repressed any former experiences in this department. In the words of HRH Céline Dion "It's all coming back to me..."

Like, seriously. If you're not reeling from the shock of someone barking that they're "only having a look" from across the lipstick display then you're throwing yourself bodily against the shelving units and re-merchandising an entire section before an investigating manager finds the placed ripped asunder.

Now, I know in my own heart and soul that some sales people will hound you until you part with your hard earned cash. I'll get to that part later on. Making a purchase isn't always a smooth sail, but let me run through a few tips with some helpful input from the "inside", as it were. I promise you, we're not all bad. A fair few of us genuinely want to help, having either witnessed or been on the end of a service similar to the above description.

Read on for a revised etiquette curriculum.

Hygiene.


Please, please, do not approach a make up counter and use products or testers straight from the display packaging. Would you share your lipstick with a friend? If the answer's yes, you'd want to be fairly good friends and privy to each other's oral hygiene. If your answer is no, then why would you do it with so many potential other people?!
Applicators will be supplied for appropriate products, if not then the products will have been cleaned and sanitised. That's to cover the necessary bases for hygiene regulation and to keep you safe. You should still ask a consultant to apply products, or lend you a clean brush for you to use on yourself. 
I am openly pleading with you not to make one of my clan follow your around the counter with sanitizing spray and a spatula to scrape away cream products. 

Communicate.

You know that product you read about? Or maybe you just wandered in to a store but it caught your eye anyway? Yeah? Well guess who knows a good bit of fairly relevant information about it. 
The person who asked you if you needed help, most likely. 
The best thing you can ever do is talk to your consultant. Whether you know exactly what you want or you haven't a clue, always ask. If you're just having a browse, work away. If you end up needing something then by all means holler. 
Everything you need to know about the product will have been handed down to us by the company themselves. If we've discovered anything unusual or interesting about the product in our time using it, you'll be informed. The worst thing you can do for yourself is fly solo through your mission and end up missing out. Being frosty doesn't make our day go quicker either. 


Respect the counter condition.

By that I mean, try to leave the counter the way you found it. It's just simple manners, to be quite honest. I'm not asking you to bring Detol and wet wipes in your handbag but try to pop things back on shelves. Putting your testers back in the wrong place is not a problem, we appreciate that you took the time to put them back at all! We'll straighten everything up later.
Part of our job is to maintain the space we work in for the public, by helping us out we really appreciate that. If you frequent any counter and you do leave the place in a horrific state, please amend your ways. The boys and girls looking after you have other responsibilities too.

Don't fear your consultant.

Let me say this. No one is gonna nail you to the floor and rob your wallet. No ons is gonna take you aside and give you a Chinese burn until you cough up the dough. You'll definitely never see a line of mascara'd and lipsticked counter staff doing the Haka between you and the door until you agree to buy the serum, moisturiser and the foundation. We're not scary people, honestly!
We work with a range of products, if you give us your situation we'll do our best to provide you with the best of what we have for your needs. I won't lie and say that making money isn't part of our job, it absolutely is. Targets are a key factor in working in retail and they determine how well we do. I've yet to meet a sales person who would send someone away with the wrong products just to rack up some numbers. The right people for the job will never lump you with something you can't use. If someone does, avoid them like the plague!
In retail your customer care is as important, if not more important, than your figures. So if I have a fantastic run on my targets but I'm horrible to people, can you guess where I'll end up? The post office of a Thursday. It literally pays us to be nice. Plus we get to play with make up all day. We're like pigs in shite!

Don't take the piss. 

I can't put it any plainer than this. Do not walk into a store and take the mickey out of the people working there. It's rude, it's disrespectful, and it's a waste of time on both parts.
Do not repeatedly ask for samples of products. Many companies work on a tester order basis. If the majority of product is given away as samples, they're left waiting for new testers to arrive.
Do not sit at a counter with no intention of buying anything but requesting that your consultant apply a full face of make up. Seriously, do not do this. There's a service charge at the very least.
Do NOT do the above and then follow it up with "Oh, well I'll be going through duty free.." They have their own staff, thanks.
Lastly, do not berate whoever is serving you about the price of your purchase. We have no control over that whatsoever. You're paying for higher quality ingredients as well as the service you receive at the point of sale. This is why the products have the price tag.


After that, I think I have no more bases to cover. Let me just say that there are so many fantastic people that I meet on a daily basis. One of my favourite things about my job is the amount of interaction and communication that goes on. Many's the time a woman has come in to top up her essentials and five minutes later we're burning the ears off each other because there's some common denominator between our lives. That's Ireland in general for you, but still.

There's always one or two characters who'll shake up your day one way or another. They say variety is the spice of life, so I suppose I should appreciate that if my job were an ice cream, it wouldn't be vanilla!

I'll have more make up based posts for you soon, don't you worry. For the time being I've been pre-occupied finding my feet a little bit. Documenting the experience has been a help!

If you've had any bizarre experiences at a make up counter, let me know. You hear the best stories about counter connections!

Until next time,
clean up after yourselves!
J x


Monday, 22 June 2015

The new kid on the block; "Strobing"

From the top, let me apologise for being absent last week. I shirked all responsibilities and took a week off work and blogging, as you do! Of course yous missed me like crazy, so naturally enough I have some making up to do.

During my week away from functioning as an actual human being I was plenty busy catching up on Youtube and Instagram. The latter brought my attention to a technique knowing as "Strobing". Me being the beauty addict that I am, I looked into it further. The look consists of a sheer to medium coverage base with highlighting products placed on the high points of the face. What this does is reflect light only where you've applied the product to subtly lift and define the features. The skin appears healthy and dewy while the face still has dimension, but without heavy contouring. Where possible, people tend to use cream highlighters to maintain a natural, seamless finish. The whole idea is to shape the face without using a lot of product.


Some are heralding this as a new-found miracle, while others are of the opinion that this has been around for ages and we were all too busy contouring ourselves and hiding our true identities behind full coverage foundation that we didn't even think about lightweight, translucent wondrousness.

Personally, I think this is a classic marketing routine that happens every year. Summer trends very rarely wander off a certain track. You have tinted moisturisers, BB creams, sheer lip and cheek colours (usually creams and gels) all coming out around the same time. To me this make sense as no one wants to be wearing a full face of war paint in upwards of 25 degree heat. Talk about creating a rod for your skincare routine.

The clever clogs behind advertising and retail promotion have to find new ways to excite us year in and year out to ensure that we continue to buy these new products. "Strobing" is this year's answer to "dewy skin","illuminated skin," "a natural sunlit glow", "a healthy sheen" ad infinitum. I think the name is really appropriate given that seventies disco glamour is definitely back with a bang (as made evident by MAC's upcoming "Le Discko" collection and the current fashion trends we're seeing) so why not call to mind disco lighting and the gorgeous seventies glow that made everyone look so soft focus and sultry?

Whatever name is being put on it, I'm in. I love it. I love everything about strategically highlighting the skin so that you look radiant and glossy. I love pairing it with bronzer and looking like the sun loves me. With that said, let me show you some of the tips and tricks I have for using different kinds of highlight this summer so that you can get'cha glow on!

Shown above; MAC Mineralize Skinfinsh in "Lightscapade", Sleek Makeup Precious Metals Highlighting palette and Benefit Cosmetics' "High Beam"

When doing this look you want to take three things into consideration; the Formula, the Placement, and the Finish. 

Formula. 
As I mentioned in a previous post about foundation, the formula of a product is how it comes in the packaging. You have three main formulas for highlighters and illuminators; powder, cream and liquid. All three have different benefits and different ways to be used. 
  • Powder; These products last the longest on the skin. They're best suited for oily skins or those who want their make up to stay put as long as possible. These are best used after you've set your base with a powder, or directly over a matte base. This will stop the product underneath from catching and will help with blending. 
  • Cream; These products tend to have the most colour intensity and pay off. These are best used over the top of your base, but definitely don't use powder under these. The cream will melt into the liquid or cream you have on underneath and give you a really natural, seamless blend. Best used over something that doesn't set matte. These work really well to add luminosity to dry and dull skin.
  • Liquid; These babies can generally be used under or over your base. Some can even be mixed into the foundation to add a less intense all-over glow. Again, I would use these without any powder underneath and I'd steer clear of using them over anything that sets to a matte finish. Liquid highlighters tend to look softer than cream versions but will add similar oomph to a thirsty, dull skin. 
Placement.
Where you place the product is going to make a big difference, similar to contouring. You want to bring forward the highest points of the face but keep everything in proportion. The best places to highlight are the tops of the cheekbones, the brow bone, just above the arch of the eyebrow, the bridge of the nose and the cupids bow. 
What you want to do is make sure that you're applying the right amount to each area. For example if you wanted to make your nose appear slimmer, apply a thin line down the centre of the nose. This will make the nose appear as though it comes to a thinner "peak" across the bridge. Similarly if you felt that adding highlighter above the brow wouldn't suit your features then by all means skip that part. 
Even without deeper shades to carve out the hollows of the face, we're still shaping with this technique. There are plenty of contouring guides across the wide, wide web. I'd totally recommend checking them out, but pay more attention to where you're highlighting and lifting rather than hollowing out. A little trick I love is to use a matte powder, either translucent or matching your base, where you don't want shine. This will help to contain the glow to those more complimentary locations. 

Finish.
The last thing to think about is the "finish" or how the products look on the skin. Do you want a high intensity sheen? Are you comfortable with something a bit more low key with a soft, satin glow instead? Is it a appropriate to receive Holy Communion looking practically bio-luminescent? Just some things to consider...  
If you're a little bit more timid, work with small increments of product. I always say you're better off starting small and building your colour and intensity rather than applying too much and wearing the face off yourself with a wipe trying to put things back in order. I'd recommend a powder highlighter to anyone looking for something more natural.
On the opposite end of the scale, if God-like glow is your thing then definitely check out cream illuminators. They blend gorgeously into the skin but impart far more sheen and shimmer than other fomulations in my experience. But do be careful and start with less than you think you need. These blend really well and can sometimes get out of hand. A little practice will set you right, though. 


With all of that said and done the only other advice I can offer you is just to jump in the deep end, bag yourself the necessary products and give it a go! This look is one that anybody can wear and it will look absolutely knockout, don't be afraid of the light! 

If you do give this a go please please pleeeease tag us on twiiter @threescompanybb or Instagram @threescompanybeauty and let us see!

Until next time,
glow get 'em! (Pun central...)
J x 

Monday, 8 June 2015

Wingin' it: Top tips for applying winged liquid/gel eyeliner.

'Ello!

Monday has rolled around again and I'm back. After a couple of weeks of skin related posts I'm bringing you more make up this time around. Today I'll be going through how I apply gel or liquid liner. I'll be including some tips and tricks along the way, as well as products I would recommend! Let's get down to business...

The first thing to think about is what product you prefer to use. I prefer a gel as I find it's easier to create a smooth line with this type of product. The formula is a little bit thicker and doesn't smudge as easily as a liquid. However, if liquid is your thing then by all means go hell for leather with that!

If you're using a gel like me then nine times out of ten it'll come in a small pot. You can use either an angled or pointed liner brush to apply this. I prefer to use an angled brush (I used Inglot's 31T brush for this particular look) as the flat edge creates a smooth line for you. I also used Inglot's #77 gel liner. It's matte black and waterproof, so it's a must have for keeping your liner looking fresh all day. Once you nail down what you want to use, it's time to start the application.


  • Start by following your lower water line and applying a line of product. The water line is the ledge of skin just above your lower lashes. By following the curve that this creates you'll find the most complimentary angle for your eye shape. Everyone's eyes are relatively close in shape so this will help create an even angle for both wings. 
  • Create a line towards the eyelid, aiming for your top lashes. You want to create a lifted triangle from your lash line to the end of your liner. This will be the body of your wing. By starting this line just away from the end of the first one you applied, you keep the thin and pointed tip on your wing. 

  • Next I take my liner right into my inner corner and lift it up along my lid. I use less product here and keep it nice and thin at the beginning. You can always build this up later if you want it thicker. 
  • Next is the part where I take my line across the top lash line! By doing this last I already have the width of my liner determined by the wing and the inner corner. I find that this stops the liner from becoming thicker than I intended. As before, you can always build on top of this later if you prefer. 

  • The last thing I do is fill in the space left between the top of my line and my lashes. I take my time here and make sure I have enough liner pushed down into my lashes so that no skin is showing between my lashes and my liner. You can use this step to add any thickness to your liner or tweak the shape. You'll see the overall shape once it's filled in completely, so I'd say wait until this step before you add on to it. 


Another little goodie worth mentioning is Duraline by Inglot. It's a mixing medium that you add to any gel liner to make it more liquid. This product is absolutely genius! Manys the time this has saved a dried liner in my kit and extended the life of it by miles. You literally only need the tiniest bit though, so do be careful. You can also use this to clean up and sharpen your eye liner once you're finished. Take it on a flat concealer brush and run it against the wing of your liner for a clean, crisp finish.

Of course there are many different liner products and brushes that you can use to achieve a gorgeous finish. Have a little shop around and a little play with some bits and pieces. By finding a product that works well you'll have half the job done before you even start.

If you have any questions, you know where to find me. Any feedback would also be really appreciated, let me know what you'd like to see! We have some fab posts planned for the coming weeks so I'm really excited for them to go live. 

Until next time,
J x 


Sunday, 31 May 2015

Looking after the skin you're in.

Good morning!

I'm having a balanced breakfast of coffee and Netflix, how you doin'?! I know I'm a day early but tomorrow (June 1st) I'll be doing the VHI Mini Marathon for charity with the lovely ladies I work with so I decided to check in with you guys while I have a free day on my hands.

While we were preparing and making lists of essentials (a hoody just in case, a change of clothes for after, wine, etc...) of course the topic of SPF came up. Being outside in the elements for 10K poses a certain level of risk. Naturally we have all bases covered by now with weatherproof clothing and SPF Factor 50 all in the one bag (I won't mention the dreaded Irish climate), but it's nice to be careful.

All of this got me thinking about taking care of your skin in general. I'll be doing an in depth post on my actual skin care routine and the products that I love soon enough. For now I've compiled a list of tips and tricks that I find make a huge difference to my skin and how it looks. Some might be obvious, but maybe one or two might be new to you and you can hopefully incorporate them from here on out. Read on and see!

Review your skin care routine every 6 months;
Just like the whole winter vs. summer wardrobe routine, your skin care should go through a little editing process every 6 months or so. Whether it just be adding something moisturising in the winter or changing your SPF level in summer, your skin will need to little bit of TLC once the temperature gauge takes a large swing in either direction. The changes don't have to be massive and you certainly don't have to spend a whole lot of money, but doing a little de-cluttering and freshening up will do your skin the world of good.

Don't forget your body;
I'm a demon for doing this. I'll go weeks without so much as a lick of lotion on my knees or elbows and I'll be howling! Wearing skinnies for prolonged periods of time when you should have slapped E45 onto your legs is punishment in itself. Take it from me, I use the exfoliating side of a sponge once a week from the neck down and use a generic body lotion to keep my skin in check. I find this helps prevent blemishes down onto the neck and chest as well. Bonus! Obviously if you have drier skin on your body or a skin condition, please be careful with the scrubbing part.

Diet;
You all know what's coming. I starts with W- and ends in -ater. There's that, and also making sure that you get decent vitamins and good food into you. You'll have more energy and appear more vibrant all around, as well as giving your skin a little boost. At the start of this year I made a major change in my diet and started a fitness routine. My skin has thanked me for it, which is a nice side effect! If that's not your cup of tea, try to include a multivitamin with breakfast as an added boost!

Sleep with your hair away from your face;
Sebum secretes onto the skin and also onto the hair. Therefore sebum is just hitching a ride along your hair shafts in between washes. If you're sleeping with your hair in your face, the oil is more likely to transfer onto your skin. I'm sure you've guessed it, but introducing excess sebum back to your skin after cleaning it isn't beneficial. Get yourself a nice lil' girlo bun on the top of your head before you settle down for fourty winks and you be grand!

Change your bedding frequently; 
This ties into the previous tip. During the night your skin will produce oil and shed dead skin cells. I know it sounds gross but it's harmless and a natural procedure for the skin to go through! However, the longer you sleep on the same bedding the more build up that will be there. I personally flip my pillows each night so that I'm sleeping on each surface as few times as possible. This will help prevent a build up on one surface. I know we're all fabulously clean and hygienic anyway, but it doesn't hurt to get into a routine.

Don't be digging in your pores;
I'm going to sound like someone's mam but leave your face alone! I'm so guilty of this, I know there's nothing more satisfying than getting rid of a nasty white head but you'll do damage. Squeezing too hard can drive the blockage deeper into the skin and damage the pore even further. It will take longer for your blemishes to heal, and there's a chance you'll leave permanent marks. If I can try, you can try!

I know a fair few of these are generic enough but you'd be surprised the differences that can be made! As I mentioned I'll be putting together a proper skin care routine post, including reviews of some products I've been quite liking. Until then I'll be incorporating the above as much as possible!

Here's hoping we're all glowing and gorgeous for this summer,
Until next time,
J x


Wednesday, 13 May 2015

The Big Day: I Do & I Dont's


Your wedding day is approaching so here is a few dos and dont's from me, to help you prepare and know what to expect when it comes to getting beautified before you say I do.

Skincare:

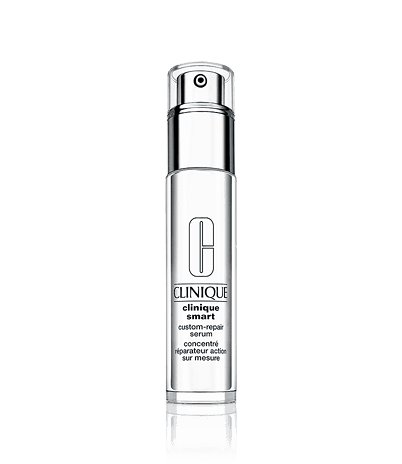
Please do not admit that your skincare routine consists of a make-up wipe, if it does get yourself down to your nearest chemist or beauty counter. Don't be afraid to talk to a consultant and find out which products best suit your skin. Personally I am a huge fan of Clinique products as they are all allergy tested and fragrance free, Clinique Smart Serum works wonders, if you want to a radiant glowing bride.


Trial:

I would always recommend a Bridal Trial as a must because everyone has they're own interpretations of natural make-up or a smokey eye. If you will be wearing false tan on your wedding day, it's a good idea to a tan trial if possible therefore your make-up artist can be fully prepared to match your foundation.

Make-Up:

Your make-up for the day should be a perfected version of you, your wedding day isn't the day to try a new look. If you have never worn eyeliner or a red lip you probably won't feel comfortable on the big day and looking back on pictures might regret your choice.

Bridesmaids:

Your bridesmaids should be prepared to do whatever you ask of them, after all it is your big day. They shouldn't refuse to wear the look you chose, request different make-up or go and alter the make-up after. So just be sure inform them of the look and what you say goes.


Timing:
 Allow extra time. You might be the most organised bride ever but be sure to allow extra time because you cannot be prepared for everything and something is bound to be forgotten or mislaid and more often than not someone will be late. Book Hair and Make-Up at the same time, if needs be they can work simultaneously or alternate between them.


Photography:

Allowing extra time will also give your photographer a chance to take some candid shots of you in the preparation stages and he or she might also have time pose some shots. Also be mindful of the rooms or area you are being photographed as these will be in the background of your wedding images.

If you're reading this in preparation for big day, I hope you have an amazing day and feel like the princess you dreamed of being as a child.


Same time next week!

Lots of Love,
A


Monday, 11 May 2015

Foundation Fact File.

Guess who has coffee and a full post's worth of make up chatter to get through? Yeah. Me. You guessed it. 

This week we're having a chinwag about foundation. Years of doing make up, and a few extra years of doing my own make up, have taught me that your foundation can make or break your look. It's also the major point of stipulation when it comes to a lot of make overs. Owing to the great passion that people have for their war paint I decided to do up a little guideline for those of you who are a bit lost when it comes to buying a foundation. 

I'll go through some common make up jargon (i.e the words that'll no doubt be hurled at you at some point when you're in store having a wander) and break them down so that the next time you need to invest the process won't be so daunting. 

Undertone; The undertone of a foundation is grouped as either warm, neutral or cool. "Warm" foundations have more yellow pigment in them, and "cool" toned products have more pink pigment. "Neutral", naturally enough, is somewhere in the middle. 
The undertone is usually the first hurdle that knocks people down. Some bases have more prominent pigments than others. As a rule of thumb, if the foundation looks grey or washed out you should try something warmer. If your foundation is coming across too yellow, or even orange, try something with a more neutral or cool tone. 

Formula; The formula is basically the way the product looks in the packaging, i.e liquid, powder, cream, etc. Different formulas have different benefits and strong points. For example a powder foundation is ideal for an oily skin type as it will absorb excess oil while you wear it. A richer liquid or cream product will be best for a drier skin as it will add a healthy sheen to the skin. 
Do a little research into the products you like the look of, as not all formulas stick to straight forward rules. There are some liquid foundations that work amazingly on oily skin and some powders that work nicely on dry skin. It all depends on the finish, which we'll cover next. 

Finish; When we talk about the "finish" of a foundation we mean how it looks on the skin. Matte, dewy and satin are all finishes. The finish isn't always determined by the formula, so as I said definitely do a little inside snooping to find out about some attractive products. 
A matte finish has no shine to it and gives a soft, powdered look to the skin. A lot of oily skin types like to go for this finish as many matte formulas will absorb excess oil and reduce unwanted shine. On the flip side we have drier skinned folk who like to add some faux glow. They might opt for a dewy finish which leaves the skin looking fresh with a sheen to it. Have a play with some foundations, ask some questions and see what takes your fancy!

Coverage; Oh, the Irish ladies are big into their coverage! Whether they like a light and sheer base or they want full on foundation, the Irish cailíns know their stuff! This is the one area that the Irish public has definitely educated themselves on, and brilliantly so. 
The coverage of a foundation determines how opaque the product is. Full coverage will completely obliterate your natural skin tone and replace it with your base colour. Medium coverage will show some texture and natural colour. Light coverage will show your skin and let it shine through while evening out the skin tone. 
One thing to consider here is whether or not you actually need a lot of coverage. One or two hormonal spots on your chin won't warrant a blanket of base across the gorgeous clear skin along your cheeks. Consider pairing your foundation with a concealer. Examine how your skin changes and behaves and let that help you in picking your foundation. 

So, armed with this knowledge, I hope that you guys and dolls have a little bit more confidence when it comes to picking out your new holy grail product. Buying a foundation can be one of the most influential purchases of your entire make up wardrobe, so I'm aiming to make it a little easier.There's a lot more that goes into creating the perfect foundation but with these four points under your belt you'll be fresh faced and fancy free in no time!

Don't forget to also follow us on twitter and Instagram, both of those are linked at the top of the home page. If you want us to see any of your posts tag us and hashtag "#ThreesCompanyBeauty"

I hope this was helpful guys!
Until next time,
J x 


Monday, 4 May 2015

The Essentials; The Brush Edition.

Monday? Check. Coffee? Check. Decaf at this hour, naturally. Another post? Check. We're in business.

Susan took up my usual haunt last Monday and did so beautifully, but I'm back this week with a post on some of my favourite brushes. These are the brushes I call on in any given situation, and the ones I think that you guys seriously need to invest in! Good brushes make all the difference when it comes to applying your war paint. 

It's a Bank Holiday Monday night so I'll keep this on the side of "Light Reading" and group these bad boys by Eyes, Skin and Lips. If anyone would like a more in depth review, just let me know and I'll throw together a lil' somethin'! For now, let's get cracking.


Eyes.


(brushes listed L-R)

Eco Tools Concealer Brush: A stiff, flat synthetic brush. Perfect for applying cream shadow. I also use this for under eye concealer, but I much prefer it for work on the eyelid.

Inglot 31T Brush: The very last word in angled brushes as far as I'm concerned. Razor thin and super precise, I love this for winged liner or for brows. The brush is flexible enough to create a soft, natural brow if needs be. 

Real Techniques Base Shadow Brush: An ideal brush to apply eye primer with. This blends cream or powder gorgeously. The brush won't absorb fluid products, making it perfect for cream products.

MAC 239: A flat brush made of goats hair. This is brilliant for packing shadow onto the eye with the best payoff. I also like this for shadow underneath the eye, as the top of the brush is thin and dense.

Inglot 6SS: A large blending brush for applying a light wash of colour, perfect for applying a contour shade into the crease. I start almost all of my eye looks with this brush to determine the space I'm working with. The 6SS is made of natural hair, so it's best for powder shadows.

MAC 217: The cult favourite. A small, oval shaped blending brush. The 217 can be used for larger areas or to add specific definition. Again this is better with powders in my experience as it is white goat's hair and can stain. I've used some popular alternatives for this brush but keep coming back to the 217.

CrownBrush C224: An oval shaped concealer brush. This is my go to brush for under eye concealer as it's dense enough to blend the product without reducing the coverage. The C224 is a basic brush I think every one should have, no one won't benefit form owning this guy.

Inglot 10S: A long, thin blending brush. This is perfect for smudging out eye liner or defining underneath the eyes as its shape keeps it really precise. I use this to create a really soft inner corner highlight as well. 

Skin.


(brushes listed L-R)

CrownBrush C435: A large, soft, angled brush. This brush blends powder bronzer over the face and neck quickly and easily without adding too much product. Plus it feels amazing on the skin!

CrownBrush C426: A huge duo-fibre brush with a domed head. I absolutely love this brush for blending powder products down onto the neck. If I have a client with a tan that doesn't quite match a shade in my kit I prefer to use a powder bronzer or foundation to match the neck as these are less likely to transfer onto clothes. This brush blends these products really softly for the most natural finish.

CrownBrush C466: A classic flat foundation brush. This is synthethic but incredibly soft. I get no streaky lines when I apply liquid products with this brush. Being totally honest, I was never a fan of this type of brush until I picked this one up. I now own three. That's how fabulous this is. 

CrownBrush C427: A smaller version of the C426, and more dense. You can be a lot more precise with this brush, I love this for applying a contour product with. Being duo fibre it works equally well with powders and creams. I own a couple of these as they work well for blush so I may use more than one at a time. 

Inglot 4SS: A large blending brush. This brush is so soft that I look for reasons to use this, just to feel it on my face! It's best for applying product in a specific area. I find this a little bit small for blush but I love it for specific contour or highlight placement. Despite being natural hair it works quite well with creams. 

Real Techniques Buffing Brush: If I'm in a rush, I pull out this guy. It blends product into the skin for a gorgeous natural finish. I use this with MAC Studio Fix Powder for easy coverage and even skin when I roll out of bed 25 minutes late. This is a Godsend. 


Lips.


(brushes listed L-R)

CrownBrush C463: An angled brush that's perfect for getting crisp lip lines. I love this for defining the outside of the cupid's bow. The edge is flat as opposed to curved so it does half of the work for you. 

Real Techniques Accent Brush: The tip of this brush is rounded, so I do love this for defining the curved bow of the lip. This is irreplaceable for me when it comes to doing dark, precise lip colours. I know this is marketed as an eye brush, but for me it's lips all the way. 

Face2 304 Lip Brush: I picked this brush up out of need rather than interest to be honest, but I ended up loving it. The brush is flexible enough to blend lip liner and lipstick together without losing control of the product. I also love this for touch ups. Once I have my shape defined, this brush fills the space really easily. 


I could go on from here, but I'll leave it at that. It's safe to say that these have become tools of my trade. If any of these become discontinued I'll have to hang up my brush belt for good! If you like the look of anything you see above, I've included links to some online shops below:

To purchase any of the CrownBrush items you can visit their online shop here.
MAC and Inglot brushes can be purchased from theie respective retail locations around Ireland. Inglot Ireland have an online shop, for their brushes you can click here. 
Real Techniques And Eco Tools retail in Boots in Ireland and can be purchased from the Boots website here. 
Face2 retail through Makeup Forever on Clarendon Street, Dublin. To purchase the Face2 Lip Brush through the Makeup Forever website, click here.

With all of that said, I'll leave it right there. As always, get in touch on our other social media locations. All of those are linked at the top of the blog. Blah,blah, blah, shameless plug and traffic driving through different platforms, you know the story by now...

Good night and God bless!
J x 


Sunday, 29 March 2015

Brand Review - Sugarpill Cosmetics!

Hello, my lovelies!


Today I took to my face to reacquaint myself with the delicious products from Sugarpill Cosmetics. Not that these babies needed much reintroduction. To cut a long story short, I'm hooked!

However, in the interests of a fair and impartial review I dabbled with the products I own and inevitably used all of them at once (please see above for evidence). Below is a review of my experience with the brand. This will include the products themselves but also customer care and delivery time. Sure we'll crack on!

Product Quality

Sugarpill Cosmetics provide a range of pressed powder eyeshadows, loose pigments, false eyelashes and a small set of synthetic make up brushes. All of Sugarpill's products are brightly coloured and incredibly pigmented. For anyone looking to branch out into more colourful cosmetics, these guys are a must! The eyeshadows come in matte, satin and frosted finishes. The majority of their loose pigments are metallic or contain some element of sparkle.

Most of the products I own are pressed powder shadows. The formula is nice and soft and blends incredibly well, however the more metallic shades can cause a little fallout if you have a heavier hand. Each shadow contains 3.5 grams of product for $13, or just under €12. At over twice the product than in a regular MAC eyeshadow and for a fraction of the price, they're an absolute steal! These prices are from the Sugarpill website and not individual stockists.

Score: 8/10

Customer Care

I've honestly only had to contact the company once. For Black Friday and Cyber Monday last year Sugarpill had a sale online and I lost the run of myself and bought the place dry, naturally enough. I wanted to check on my goods as it had been about three and a half weeks since purchase and they hadn't arrived (understandable delays due to an increase in orders). I had lost my order number and so couldn't track my order, but when I emailed their support team the service was quick and efficient. I was back on track within about two business days.

It's worth mentioning that all products are manufactured completely cruelty free. Not all products are vegan but there is a "Vegan" section for conscious beauty buyers. Fantastic news!

Score: 9/10

Delivery and Packaging

All Sugarpill packaging is adorable and features the signature "Pill Kitty" logo, from product to postage boxes. All orders come with a complimentary Sugarpill logo sticker and a sample of loose pigment. Larger orders generally receive more complimentary goodies in my experience.


Products are shipped from the US so it takes between ten and fourteen business days for me to receive them here in Ireland. To me, that's a fair waiting time considering the company themselves package and ship their items, as well as taking into account international postage. 

Postage prices are a little higher given the aforementioned international status. If you know someone in the states, have it shipped to them for a flat rate of $6 and throw them the difference for sending it to you. Problem solved, essentially! If you can't go that route just be conscious that larger orders incur a larger postage fee.

Score: 7/10


You were warned, I'm genuinely hooked! With a fantastic social media presence and support for customers as well as everything mentioned above this brand receives and overall rating of 8/10.

For more information and to purchase Sugarpill Cosmetics you can visit http://www.sugarpillshop.com

Until next time!
J x

Thursday, 12 March 2015

But, first lemme take a selfie.

Hello World! Here is our new shiny beauty blog, as if the world needed another blog. Anyways to kick things off lets get to know us a little better. Who are we?


Aisling.


Jamie.


Susan.


We're three make up artist buddies with a strong passion for what we do and an ongoing cosmetic dependency (pending psychiatric intervention.) All three of us approach make up in different ways, and we'll be using our different styles and skills to bring you guys diverse and entertaining content. Three's Company will be covering make up (funnily enough...) hair, and skin care. There'll be videos, blog posts, instagram photos and tweets from all three of us and our main aim is to make sure that there's something for everyone out there. 

As I write this (Jamie btw, heyiz!) Susan and Aisling are as busy as little lipsticked bees creating content which we'll be editing and uploading for you guys very very soon. We're so excited to get a routine of posts going, but we'd love to hear from you guys! Definitely let us know what you'd like to see and we can work on posting the kind of thing that you guys would enjoy reading. 

Follow us here and on Instagram, Twitter and Youtube (we'll get this set up ASAP!) to make sure you get all of the necessary updates from us!

Until next time, stay classy!
J x 


Template by BloggerCandy.com | Header Image by Freepik