Pages

Showing posts with label beauty bloggers. Show all posts

Thursday, 20 August 2015

Foundation Review; YSL Fusion Ink.

Just to start, I know I deserve an absolute lynching for being AWOL lately. I can't help it, apparently a life outside Instagram and a blog can actually exist. I never had one before, but sure look!

We'll begin this week's post afresh as if I'm not in the wrong, ok? Grand!

This week I'm bringing you a review of a foundation that I've been eye balling for the last while. It is (as the title suggests) the Fusion Ink foundation by YSL. I'll go into the detail about the foundation further on in the post, but I'll start by saying that I've been looking for this kind of foundation for a while.
I prefer a sheer liquid product to blend my concealers into so that I can use a powder foundation over top for fuller coverage and better staying power. We all know my skin is an oil reservoir so tinted moisturisers are a no no as they stay creamy on the skin. I was looking for something with sheer coverage but a natural to matte finish.

With that kind of foundation in mind I decided to try this product out after a recommendation from our very own Susan. To see her verdict you should check out the post before this one! On a shopping trip in town I very cheekily got a sample from YSL in Brown Thomas and I've been playing with it ever since!

As with my previous review on MAC's Studio Fix Powder foundation I'll break this down into YSL's description, my own thoughts, application process and overall verdict. Grab your popcorn!

Fusion Ink Foundation by YvesSaintLaurent.

My tiny little sample, so cute!

YSL says: "24 hours of soft-matte perfection and comfort. Our exclusive fine-as-ink formula perfects the skin yet wears weightlessly all day. Never cakey or heavy. Feel the difference of all day perfection and freedom." Just to note as well that this retails at €40 in Brown Thomas.

I say; This is a sheer fluid foundation that sets to a natural matte finish on the skin. I find that it improves the look of surface texture and doesn't settle into pores. The coverage is light but can be built up to a degree. The skin looks polished but not flat or powdery. I would disagree with the "all day" part as I've yet to find a foundation that doesn't settle or slip at some stage. Read on for deets on that aspect!


From top to bottom: Clean skin, a single layer of YSL Fusion Ink, and finally the same layer of foundation with concealer where needed and set in place with MAC Studio Fix Powder in NW15

How I apply; I use the applicator that comes in the sample bottle to swipe the product onto the skin. The full size bottle comes with its own that's shaped like the nib of fountain pen. Genius!
I start across my nose and cheeks and move out towards my hairline. That's followed by my forehead, jawline and chin. I use a damp Real Technique's Miracle Complexion Sponge to blend the foundation into my skin. 
I know that this technique will reduce the coverage a little. As that's not what I reply on this for I'm not too concerned. I find that using the product this way gives the most natural finish. I then layer concealer where needed. As you can see in the images this is mainly under the eyes and around the nose. I used a thicker concealer just to hide the blemishes on my chin. Once that's all in place I set down with a light layer of my MAC powder foundation. 

Overall verdict; This is the kind of product I've been on the hunt for! It gives a gorgeous natural finish that lasts on an oilier skin. For anyone with an oily skin that isn't looking for massive coverage this product is one to try out. 
As I mentioned before I look for something that will even out my skin and look more natural but without the traditional tinted moisturiser feel. Again I prefer to use a powder foundation on top of everything for more coverage. I find that my base will last longer this way rather than if I use a heavy liquid.
As with any foundation the coverage will thin out as oil comes through. I wore this without a primer to see how long it would last, and it held up well for the most part for such a fluid consistency. I found that it did crease into my smile lines towards the middle of the day but that's a problem with any liquid foundation for me. Other than that the skin had more of a sheen than an oily, greasy look. I personally like the look of make up that's disintegrated a little so I actually like this once it's melted a little bit.
I have a particularly congested forehead at times so I did see a little separation where there were minor dry patches around blemishes. The pigments clung to the drier skin while the rest appeared more diffused at the end of the day. This was only visible on close inspection but if you're of the dry skinned persuasion I'd make sure to prep accordingly. 

With all of the said I think you get the gist! I'll definitely be buying a full size bottle of this, I'm smitten. Any issues that I have with this can be monitored and taken care of, they're down to my skin condition rather than any short comings. I'm eager to pit this against similar foundation consistencies in future so keep an eye out for that!

If you have any further questions or you want to have a chinwag about other base products you love then definitely get in touch, I'm a foundation fiend!

Until next time,
goodnight and God bless.
J x 

Friday, 7 August 2015

Product Review; Vichy Aqualia Thermal.

Good evening!

I can't actually describe how excited I am to be bringing you this review. I'm a little bit worried that it's a Friday night and I'm more excited to talk about a facial serum than throw on clean jeans and go out. That being said, the money most people spend on a good session I plug into skincare. No hangover, and a cleansing routine so regimental and steadfast that any neat freak would experience nirvana. It's not all bad.

I've been on a bit of a skincare crusade for the last while, as my skin is temperamental at the best times. I have oily skin that's prone to dehydration, which can cause havoc. My main issue was always either loading my skin with products that were too heavy or not adding enough water back to my skin. Both scenarios had desperate consequences. Skip through many years of stressed teenage skin (can you imagine?! My face was in the horrors) to my discovery of liquid exfoliation, hyaluronic acid, and gel moisturisers. My skin is by no means heavenly but I know enough to manage it at this stage. Big thanks to Caroline Hirons' blog and our very own Susan for giving me advice along the way. My face thanks you both.


This week I added to my collection. I've been trialling Vichy Aqualia Thermal Serum and Awakening Eye Balm for the last few days. I got about three uses out of each product before I was itching to rave about them. I discovered the serum online (big kudos to the Hirons and Sali Hughes) and it ticked all the proverbial boxes for me. Lightweight, but packed with skin loving and water infusing ingredients. In my hunt for it I also came across the eye balm which I promptly snapped up to go with it. I've been indulging ever since.

I'm going to do this review in two parts, and give an overall verdict. This way I can give the most information on each product, but keep it all as organised and understandable as possible.


The Serum. 

What is it?
A fluid product designed to soothe sensitive and dehydrated skin. As a serum, this is applied your moisturiser.

How does it work? 
Aqualia Thermal has glycerin and hyaluronic acid derivatives inside. Glycerin attracts moisture to the skin, while hyaluronic acid can hold a dense amount of water and store it. Together these flood the skin with water instead of oil to relieve dehydration without weighing the skin down with oil.

How does it feel?
Amazing, really refreshing. A little goes a long way with this. My skin feels so comfortable since I've started using these. There's no tight, drawn feeling after cleansing. It doesn't soak in ridiculously fast either so I never feel like I have to load more product on to get the full effect. A couple of pumps should be enough for the entire face.


The Eye Balm.

What is it?
A "balm" to combat dehydration around the eye area. I would call this a gel, to be honest. Either way it's a moisturising product for the eye that promises to reduce the signs of dehydration and soothe the delicate skin in that region. The title says "Awakening" but I use it morning and evening.

How does it work?
This product contains the same hydrating ingredients as the facial serum, and also caffeine. Given that this combats a lack of water in the skin I'm glad to see these ingredients here. If budget is an issue, you can totally use the serum around the eye. I've tried both, both ways work fine, I just like the richer texture of the gel around the eye. Caffeine? You could leave it to be honest.

How does it feel? 
Once again, this feels lovely. Because it's a thicker consistency it does take longer to soak in, but it feel nice and soothing. I use a lot of eye make up when I trowel on the war paint, so the removal can get a bit heavy duty. This was a pleasure to pop on after a serious strip down, with a slight cooling feeling.

The Overall Verdict. 

I'm sold on these guys. With the Serum clocking in at €22.49 and the Eye Balm at €19.90 (both from Boots) I can't complain. As I mentioned, both contain the same ingredients to boost water levels in the skin so if money is an issue I'd grab the serum and just use it around the eye.
As someone with an oily skin finding something to hydrate without heaviness has been a bit of a task. My skin reacts quite quickly to anything weighing it down, but this has been a delight.
Anyone with a drier skin, this is worth checking out. If your skin feels tight or tender it could be a lack of water as well as oil. Tackling one will help you cope with the other.

And that, lads and lassies, is that. I've just used these after a shower, and I'm still stuck in the novelty like a child at Christmas. I kind of want to clean my face again just to have another go. I won't though, they're too precious to waste!

Next week I'll be posting a full skincare routine and what I use at each step, so keep an eye out for that.

Until next time,
J x

Friday, 31 July 2015

Colour Correcting; The even better solution to fabulous skin.

Hola compadrés!

Apologies for the delay in my post this week, I can only imagine the devastation the delay caused. I have returned at the opposite end of the week to bring you more tips and tricks. As per usual real life decided to park itself right in the middle of my routine. Honest to God, the cheek.

Anyway! My skin has been a bit unruly as of late, so I've taken to using an old school green corrector under my foundation to tackle the high colouring around some choice "activity". I haven't used a correcting product in ages, so naturally the novelty kicked in and I had to have a go of everything; the under-eye blackness, the blemishes, and a little bit of brightening primer for the whole shooting galley. I lost the run of myself entirely.

I've since calmed down and gone back to a more moderate routine that lets me out the door at a reasonable time in the morning. Today I've brought a little bit of information with me about correcting products and what they do. I'll be sharing this info with you ('cause I'm nice, see) and talking about how to use different products for different problems. If needs be then now would be the time to grab a cuppa/snack/put the child to bed before we move on.


The whole theory behind colour correcting is that opposite colours on the colour wheel will cancel each other out. Products with specific tones in them will even the look of the skin once foundation is applied on top, helping to conceal really stubborn colour issues. There are different colours for different problems, but we'll get into that a little bit later on. The general rule with this technique is that the deeper your skin tone is, the more intense the colour of your corrector should be.
It can all be a little bit complicated if it's new to you. Chances are that either the packaging or a consultant will inform you as to what each product does, so take your time when picking out one for yourself if you think you'd like to try it out. 

Colour correctors usually come in two forms, one being a densely pigmented cream product. These are used for specific areas of discolouration on the skin. These usually include heavy under eye circles and redness or red blemishes. These creamy products are applied to the area and your foundation is applied on top. They're best applied only to the offending colour, as if they bleed onto any areas of clear skin the colour can show through your base. 

The second kind of product is a sheer primer to be applied all over the face. A product like this will counteract more widespread discolouration. These have less colour in them and are used to even out a difference in skin tone rather than specific problems. Redness is one that crops up here a lot, but also sallow complections and dull, tired skin benefit from these bad boys. Again, both formulas come in different colours to take care of different things. The general, run of the mill colours that crop up again and again will be broken down for you below. 

Green: As far as I've seen this is by and large the most common colour marketed to the public. It's also very easy to use this wrong, although I kind of feel like that's not always the consumer's fault. Green tones will cancel out excess redness, be it widespread or localised. These come in either a concentrated corrector or a fluid base depending on what your skin needs.
Green can be notoriously difficult to hide with a foundation, so using a softer green tone is definitely more advisable. Less intense redness could get away with a yellow toned primer, and it'll be far easier to cover.

Peach/Pink: Either a soft peach or a rosy pink will cancel out blue tones in the skin. Sometimes these guys go unnoticed because they're often sold as concealers for the under eye area rather than dedicated correctors. That being said they're most suited to that area as they combat the cool tone in under eye darkness. For paler skin, try a more pink tone. For medium skin tones a warm peach will be fine. If you have a deeper skin tone then something more orange-peach will work better for you. 
If you find a primer with this tone to it (Smashbox do a fantastic one) then you can use it to brighten dull skin. Darker ladies will see a renewed glow to their skin if a warm base is applied under foundation. 

Yellow: This is for covering bruising or scar tissue with a purple hue to a it. Yellow creams are fantastic for hiding stubborn purple discolouration, especially those found in healing surface injuries. An eye primer with a yellow tone to it can help to disguise visible veins under the thin skin on the eyelid. That much has been learned from experience!
A sheer base with a yellow tint to it will liven up tired skin on the paler end of the spectrum, or kick start a warmer skin tone and give it an extra lit-from-within kind of radiance. 

Lilac: So we know that yellow will cancel out purple, so a purple will cancel out... Yup. Sallowness, or excessive yellow tones in the skin. 
Purple creams can be used to correct brown age spots in pale skin, disguise old bruising or any other discolouration with a visibly warm hue to it. I wouldn't use this colour on warmer or black skin as it'll show up as ashy and grey. Us white walkers can pull this off, though. 
Lilac toned base products will revive cooler skin tones and add back a porcelain glow. The palest of pink tones will love the effect this has one waking up your skin. Just don't go too purple, anyone remember that scene with Edward Scissorhands and the Avon lady? Yeah. That can actually happen. 

Beyond those listed above there are a multitude of colours that aim to conceal and correct something or other. Take your time picking out one for you, and keep in mind the four basic colours above. Any other variations will generally stem from one of the problem solvers we discussed mere moments ago. 

Colour correcting can be a fantastic weapon in your beauty arsenal but if you're still a bit iffy, feel free to contact a make up artist and book an appointment. Let them know what it is you're looking to learn and achieve, I've no doubt they'll be more than happy to give you a dig out.

As always, any queries or questions are more than welcome! You know where to find us.

Until next time,
J x 


Monday, 20 July 2015

Cream Eyeshadow; how it can brighten, tighten, and lock in your look.

Good evening!

Even lifting my body off of my bed to sit down in front of my laptop and type this post is working out to be a whole lot more effort than it should. That tells you exactly the kind of day I'm having. So naturally I'm doing things the easy way today. Lazy, much?

Today's post is inspired by the amount of activity I've been doing for most of the day, i.e as little as is necessary. If you read my latest post (and why wouldn't you? Shame...) then you know that MAC's Painterly paint pot is my go to eye base. It's basically a cream eye shadow that matches my skin tone. But there are other cream products in a variety of colours that you can use to create almost any eye look. These products make doing your make up quick, easy and foolproof with minimal effort. No prizes for guessing why I love them. Intrigued? Thought so. Let me break it down.


To start with, there are two kinds of cream products for the eyes; ones that set in place to last longer and ones that stay creamy. The ones that set in place can be used alone for a quick application of colour to the eye, or they can be used as an eye shadow base. The colour and texture you use will determine how the eye make up will look overall. You can use designated products like paints pots, or even gel liners. I find Anastasia Beverly Hills' "Dipbrow" to be a brilliant cream shadow as well. These all dry to last throughout the day.

Using a cream eye shadow that matches your own skin tone will simply keep the colours on longer and make them easier to blend. It'll make the colour a little more vibrant but overall they should look the same as in the pan. Using a bright base will make vivid colours appear more intense. Using a darker coloured primer will make the eye make up appear more smokey and dramatic. If you use a particular tone or colour similar to powder shadows applied on top then you'll amp up the drama and make them more vibrant! 

Example; MAC "Deeply Dashing" pressed pigment applied alone, then over "Painterly" Paint Pot and finally on top of  "Pomegranate" Colour Tattoo by Maybeline. The darker red base brings out the warmth in Deeply Dashing, changing the tone of the product.

The second kind of product, the one that stays creamy, can be a multitude of things. You can use coloured face paint, concealers, eye liner pencils, and tons more. These products tend not to last as long and definitely need to be set in place with a powder product in a similar colour. You do have much more choice of colour, though. I'd stay away from lipsticks, lip liners and cream blushes as some of the red pigments can irritate the eyes. The most popular choice for this option is pencil eye liners. They're waxy and smooth and often quite easy to blend. This option is more suited to photographic or fashion make up looks, as it won't last all day on most people. 

Cream colours are essential for many make up artists and they're a fab little technique to add to your make up routine to make day to day beautifying that little bit easier. Whether you want to add a brightened effect to your eyes (that's me of an early morning shift) or you want something more dramatic and smokey then a cream shadow will work wonders for you. 

If you decide to experiment with some more colourful products and take a step outside your own comfort zone then definitely show me! You know where to find me, as always links are at the top of the blog. 

As for me, I'm cleaning up after myself and diving into bed. Don't judge, the evenings are already getting shorter. Say nothing'! 

Until next time!
J x 

Monday, 13 July 2015

Back to basics; My go-to goodies.

Good evening, folks!

In a similar vein to last week's update, I've been a little bit busy as of late! I've been in work all of this weekend and I had a packed week last week. Not that it wasn't fun (I can't mention how fun as that info would be woefully incriminating!) but it certainly kept me on my toes. I discovered, entirely by accident as I was getting ready one day, that I'd started to stockpile some old reliables and kept them close to hand. Given that sleep was a commodity, I found it easier to remove the usual deadened look off myself this way.

Let me preface this by saying that I don't own a set "make up bag" as such. I do have preferred products but seeing as I've amassed a bit of a collection my face tends to be different every day. It was kind of a surprise to me when I ended up keeping the items I'll mention below in a small case on top of my desk. I'll be honest, I found it adorable. Every morning it greeted me with the same reliability as public transport would in any other country on Earth bar our own. Who wouldn't find their day bolstered with that kind of sweet routine amid daily chaos?

I'm not saying that I used all of these products every single day, I chopped and changed depending on my humour. On inspection when I decided to make this post, these were the items tucked inside the small acrylic case. I'm gonna go through each one and explain how I use it, why I like it and where appropriate, who I might recommend it to. Got your popcorn? Good. Away we go.


No. 7 Brilliantly Bare Beauty Enhancer: I've talked about this product in a primer post before. I love this because it's a lightweight, silicone based primer with a yellow tint. This brightens my skin alone, but I mix this with a concealer and use this all over as my base. 

M.A.C Prolongwear Concealer; This product forms the colour in my pseud-foundation. I mix this with my Brilliantly Bare all over and then use it alone under my eyes. It's a fluid with fantastic coverage that sets down and forms a film on the skin. My undereye area will always be a problem, but this is definitely the most flattering product I've ever worn. I find that using this with a silicone based primer gives a long wearing but natural coverage suitable for oily skin. Some Face & Body products are gorgeous on the skin but far too moisturising for me. 

M.A.C Full Coverage Foundation; This product was the topic of debate online for a while, but essentially this is M.A.C's Studio Finish concealer in a larger pot. Unless you want to be finicky about ingredients then both products do exactly the same thing. The upside is you save yourself a ton of money buying the larger version. I have a couple of colours I mix and apply to match my base. I use this for blemishes, never under my eyes. It's far too creamy. 

M.A.C Studio Fix Podwer Foundation; Can you see where I'm going with the whole base routine? I use small amounts of products with decent coverage to create a natural looking, even skin. I press this foundation over my T-zone to keep my oil at bay. On super quick days I'll use my primer by itself and layer this on top. This products is honestly a Godsend for oily skinned folk. 

M.A.C "Harmony" Blush: I promise I don't only use M.A.C products. I went on a serious spending spree at one point and still use most of the products that I bought. This blush is a brilliant contour colour for me. I have very fair, neutral to cool toned skin. The grey tone of this products gives me a natural looking shadow without being too warm. 

Illamasqua "Lover" Blush: See? See?! Proof that I'm not a one brand man. I got this products on sale and I'm more than delighted with it. It's a peach blusher that blends amazingly to add a natural flush to the cheeks. This is perfect for lifting my complection without adding too much colour. It's so soft in the pan and smells divine as well. I'm dying to try more blushes from this company.

M.A.C "Lightscapade" Mineralize Skinfinish: This is a pale coloured highlighter with cool undertones and a soft, satin finish. This gives a subtle but noticeable highlight without being too shiny. Again, those of us in the oily clan will like this because it won't make us too luminous later in the day. For all my pale folks, this is a must. It won't deposit any colour on the skin so you'll end up with a gorgeous highlight that actually lifts your features without making you look either orange or like you've run a mile. Aka; pink and shimmering. 

M.A.C "Painterly" Paint Pot: I'm starting to look like I lied at this point, but anyway! Bear with me, they're so worth it! Painterly is a cool neutral cream shadow that sets to a matte finish on the skin. This makes it the perfect product to use alone to brighten the eye or as a really good base for eye shadow. Anyone with a warmer undertone could try "Soft Ochre", it's much the same but with a yellow base to it. 

Illamasqua "Fidelity" Eye Pencil:  A medium to deep brown eye liner. Simple sounding, but I've actually never found a colour I like as much as this. It has all the impact of a black pencil, can be used as a base for darker shadows but won't leave a muddy or grey tone that some products can. 

Benefit Rollerlash Mascara: This gives me the length and definition  that I want without it being too dramatic. The smaller bristles on one side of the curved wand make doing your lower lashes a whole lot easier. This doesn't clump, create spidery lashes or go crispy once it sets. An A+ in my book.

Illamasqua "Strike" Precision Brow Gel: Now, I do like the Dipbrow Pomade by Anastasia Beverly Hills. However, by comparison the Illamasqua gel doesn't dry as quickly which gives me plenty of time to play. It also means the product stays nice and fluid in the packaging itself. I know that Illamasqua do more colours in this particular brow gel. I'm happy enough with the colour for the moment but once I'm out of it I might look for something more along the lines of my (clearly dyed) red hair. 

Smashbox Full Exposure Palette: This has been a firm favourite of mine for a while, so much so that I bought two. One for myself to use and one to use in my kit for freelance work. It has a cool toned and a warm toned side, both consisting of matte and shimmering shadows. This is a basic set of shadows that anyone entering make up artistry should have, all in one place. The centre shadow on the shimmering row is a gorgeous highlighter for the skin as well. Multi purpose products always catch me in the end!

M.A.C "Flesh-pot" Lipstick: A pale pink lipstick that's just nude enough to be swiped over the lips and it's good to go. This gives me enough colour that I look like I have something on my lips but it's so easy and effortless that I'd genuinely be lost without it. This, mascara and some highlighter on the skin is one of the lowest maintenance but instantly brightening "faces" that I have in my arsenal. 

As I said, I don't use all of this loveliness on my face at once. I'd be an eternity getting it all in place. I did find that whether I wanted to vary my make up or keep it simple these were never far from my reach. I'm contemplating investing in an actually make up bag, one that was purposed to carry cosmetics from its very creation. The novelty is a little bit addictive. 

See something you like up above? Let me know if you use it differently! If you have any suggestions for bits and pieces that I might like then please let me know. Any excuse to obtain more make up is justifiable in my eyes. 

Until next time, 
J x 


Sunday, 31 May 2015

Looking after the skin you're in.

Good morning!

I'm having a balanced breakfast of coffee and Netflix, how you doin'?! I know I'm a day early but tomorrow (June 1st) I'll be doing the VHI Mini Marathon for charity with the lovely ladies I work with so I decided to check in with you guys while I have a free day on my hands.

While we were preparing and making lists of essentials (a hoody just in case, a change of clothes for after, wine, etc...) of course the topic of SPF came up. Being outside in the elements for 10K poses a certain level of risk. Naturally we have all bases covered by now with weatherproof clothing and SPF Factor 50 all in the one bag (I won't mention the dreaded Irish climate), but it's nice to be careful.

All of this got me thinking about taking care of your skin in general. I'll be doing an in depth post on my actual skin care routine and the products that I love soon enough. For now I've compiled a list of tips and tricks that I find make a huge difference to my skin and how it looks. Some might be obvious, but maybe one or two might be new to you and you can hopefully incorporate them from here on out. Read on and see!

Review your skin care routine every 6 months;
Just like the whole winter vs. summer wardrobe routine, your skin care should go through a little editing process every 6 months or so. Whether it just be adding something moisturising in the winter or changing your SPF level in summer, your skin will need to little bit of TLC once the temperature gauge takes a large swing in either direction. The changes don't have to be massive and you certainly don't have to spend a whole lot of money, but doing a little de-cluttering and freshening up will do your skin the world of good.

Don't forget your body;
I'm a demon for doing this. I'll go weeks without so much as a lick of lotion on my knees or elbows and I'll be howling! Wearing skinnies for prolonged periods of time when you should have slapped E45 onto your legs is punishment in itself. Take it from me, I use the exfoliating side of a sponge once a week from the neck down and use a generic body lotion to keep my skin in check. I find this helps prevent blemishes down onto the neck and chest as well. Bonus! Obviously if you have drier skin on your body or a skin condition, please be careful with the scrubbing part.

Diet;
You all know what's coming. I starts with W- and ends in -ater. There's that, and also making sure that you get decent vitamins and good food into you. You'll have more energy and appear more vibrant all around, as well as giving your skin a little boost. At the start of this year I made a major change in my diet and started a fitness routine. My skin has thanked me for it, which is a nice side effect! If that's not your cup of tea, try to include a multivitamin with breakfast as an added boost!

Sleep with your hair away from your face;
Sebum secretes onto the skin and also onto the hair. Therefore sebum is just hitching a ride along your hair shafts in between washes. If you're sleeping with your hair in your face, the oil is more likely to transfer onto your skin. I'm sure you've guessed it, but introducing excess sebum back to your skin after cleaning it isn't beneficial. Get yourself a nice lil' girlo bun on the top of your head before you settle down for fourty winks and you be grand!

Change your bedding frequently; 
This ties into the previous tip. During the night your skin will produce oil and shed dead skin cells. I know it sounds gross but it's harmless and a natural procedure for the skin to go through! However, the longer you sleep on the same bedding the more build up that will be there. I personally flip my pillows each night so that I'm sleeping on each surface as few times as possible. This will help prevent a build up on one surface. I know we're all fabulously clean and hygienic anyway, but it doesn't hurt to get into a routine.

Don't be digging in your pores;
I'm going to sound like someone's mam but leave your face alone! I'm so guilty of this, I know there's nothing more satisfying than getting rid of a nasty white head but you'll do damage. Squeezing too hard can drive the blockage deeper into the skin and damage the pore even further. It will take longer for your blemishes to heal, and there's a chance you'll leave permanent marks. If I can try, you can try!

I know a fair few of these are generic enough but you'd be surprised the differences that can be made! As I mentioned I'll be putting together a proper skin care routine post, including reviews of some products I've been quite liking. Until then I'll be incorporating the above as much as possible!

Here's hoping we're all glowing and gorgeous for this summer,
Until next time,
J x


Monday, 25 May 2015

My Staple Pieces; MAC Studio Fix Powder Foundation.

Ah, home sweet home. A.K.A a Monday where I'm in the comfiest clothes I own planted in front of a laptop with photos syncing to Dropbox so I can gush about cosmetics. You know the drill by now.

The post I'll be doing today is a review I probably should have opened with. I have no idea why it's taken me so long to get around to talking about this. I'm actually a little bit embarrassed because if you've heard me talk about make up before chances are I've mentioned this at least fifteen times.

It is, of course, MAC Studio Fix Powder foundation. I first came across this baby when I saw Chrisppy use it in her videos. I thought it looked good, and I'd heard good things about powder foundations for oily skins. So I took myself off to my nearest MAC counter and picked it up. Here is a breakdown of what the product is, how I use it, and why I love it.


MAC says: "Stuido Fix is a one-step powder and foundation that provides a smooth, all-matte, full-coverage finish. Long-wearing, velvety texture that allows skin to breathe."

I say; A powder foundation with medium, buildable coverage. I disagree that this is full coverage. I would say that you can definitely build it to that level but because it's a powder I wouldn't for fear of it looking cakey. I personally layer a concealer underneath if I feel I need it. I do like the wear time on this, though. Even when my oil comes through later in the day I don't think it looks bad at all. 

On the left side of my face is one layer of 
Studioo Fix Powder. On the right side, clean skin.

How I apply; I start with clean, moisturised skin. It's important to make sure your skin is moisturised properly. This is a powder foundation so any areas with dry texture will immediately show up. I then prime with whatever product tickles my fancy on any given day. I apply Studio Fix Powder with a short, medium density buffing brush similar to a MAC 109. I find that this gives me a more natural looking finish and doesn't apply the product too thickly. A bonus for me is that if I'm feeling lazy and don't remove my facial hair (boy status showing, right?) I can buff a little bit into the edges and not have it really noticeable in that area. If I have any minor colour still coming through I use a small amount of product and add an extra layer in those places only. 


My overall verdict on this product is that it's a must-try at the very least for anyone with oiliness as their major concern. If blemishes are a worry for you this can definitely be used as a setting powder to add extra coverage over a liquid. If you don't worry a whole lot about pigmentation then try this on it's own. I like to use a balancing primer underneath and use this as my coverage. Let me know if you'd like a full base routine and I can get that done!

As always, feel free to get in touch! Let me know what you think of my wonky eyebrows as demonstrated in the above picture, or just ask about products and techniques. You do you, boo boo! 

Until next time,
stay classy San Diego!
J x 


Friday, 22 May 2015

"Setting" the record straight; Hydrating sprays vs. Setting sprays.

Good evening, ladies and gents. I'm outside of my usual Monday time frame I know, but that can't be helped. I'm here tonight instead, and I'm going to address a misconception that I come across quite frequently. This is something I used to take as gospel as well, but I'm now the wiser. The presumed notion I'll be referring to is as follows;

"MAC Fix+ is a setting spray."

On closer inspection Fix+ isn't a setting spray (although it does leave a nice finish once all of the make up has been applied.) It won't, however, increase the wear time of your make up. It's far from "setting" that this beauty was reared. 

Given that various beauty houses and even skincare brands have their own version of spray on products (be they toners, moisturising mists or other inventions) I think it's important to address the difference between the two key groups and let you guys know what they can be used for, and how to get the best out of your product. I'll start with the hydrating lads, shall I?

Hydrating sprays.

Main use; To add moisture back to dry, dehydrated skins. 

Key Ingredients; Glycerin. Rosewater, Aloe Vera extract is also listed quite frequently.

These sprays are generally marketed more as skincare, and they work really well at this step. Fix+ contains glycerin which is a humectant. Any humectant ingredient binds water to the skin by absorbing moisture in the environment. Layering these under serums and moisturisers will help to hydrate the skin. Products like Moisture Surge Face Spray by Clinique and Jurlique's Calming Mist are both hydrating and soothing sprays that contain this fantastic little ingredient. 
For the drier skin types out there, feel free to spritz a light layer over your make up to bring back a healthy sheen to the skin! These won't lock your war paint into place so for my oily skinned clan, stick to using these in your skin routine.

Setting sprays. 

Main use; To set the make up and keep it in place all day. Some can be used to prime the skin also.

Key Ingredients; Silicon ingredients, many contain alcohol.

In the style of Ronseal, these do exactly what they say on the tin. These products are designed to set the make up in place by leaving a lightweight, oil-controlling film across the skin so that the end result doesn't look heavy or cakey. These are usually offered as an alternative to setting powders, or to take away the look of heavy powder application. 
I've looked at the ingredients of a few choice options and they mostly contain silicon elements. If you remember the post about skin primers you'll know that these ingredients are beneficial for oily skins. This makes them fantastic primers as well, especially if you don't want too many heavy duty products on your skin. The down side is that they often contain alcohol so that the liquid can evaporate from the skin's surface. This will stop it mingling with any naturally occurring sebum but if you're in any way dry or sensitive I'd turn your head at this point. 
If you're interested in taking them for a test drive then definitely check out Urban Decay's De-Slick, Cinema Secrets Super Sealer or Model in a Bottle's Original Setting Spray. 

I know there's not a whole world of difference when it boils down to it but picking up the wrong one could wreak havoc on your beauty regimen. I'm by no means a skincare or product development aficionado, but my college days left me with some valuable info. Get into the habit of checking out what's in your beauty bits and pieces and you'll thank me, promise!

If you want to see some more product break downs like this one, definitely let me know! Give me another reason to spend hours reading about make up. Like, please? 

*insert the usual tired speech about various social media links at the top of the blog right here* I know I'm dragging the arse out of it now, I'm sorry. Not sorry enough to stop but I do feel a small twinge of guilt. Definite character progression, no? 

I hope this was in some way helpful.
Until next time, 
J x 


Wednesday, 20 May 2015

My Essential/Favourite/Can't Live Without Kit Products:


So this is just a few products that I love, can't live without. These are products that I always seem to use personally and products that I turn to for the majority of my makeovers. Apologies about the limited range of brands, these are just products that I have used and loved, but I do need to branch out and try other brands. You can probably also tell that I love warm neutral colours, I know I need to be brave and venture out into the world of colour.
  1. Smashbox Luminizing Primer: This primer just gives a sheer golden radiance to the skin which I love. I also like to use it if someone is wearing false tan as the golden glow works great paired with a tan. This primer is also great when away in the sun and worn underneath a BB or CC Cream.
  2. MAC Strobe Cream: This is a wonder cream, it instantly hydrates and brightens skin. It works great on dry, dehydrated, tired or dull skin as it quickly boost moisture and radiance.
  3. Smashbox Primer Water: So this is one of my most recent additions to my kit and I've been using it everyday since. Use it under make as a super sheer and light primer, it can also be used on top of powder to set your look for the day and throughout for an instant hydration boost. You and others will notice the difference it makes, skin looks healthy and glowing.
  4. Inglot Duraline: This product is the best friend of winged liner and make-up artists. It is a mixing medium which can be used with gel liners to make them more fluid or with pigments to create your own liner or use it on its own with a clean angle brush to sharpen or fix a winged liner. 
  5.  Inglot AMC Gel Liner 77: Definitely my favourite gel eye liner, the pigment is super intense and long wearing. This is the perfect winged liner product. The colour pay off is instant and doesn't budge or crease.
  6.  MAC Warm Neutral Palette: This palette is a must have for anyone who loves a natural smokey eye. It contains 15 warm eyeshadow shades perfect for creating a range of looks but I think it is super suited to bridal looks which tend to be a little softer and romantic.
  7.  Smashbox Suntan Matte Bronzer: My perfect matte bronzer, use it to warm the skin, add colour or use for a soft contour. The colour is completely matte and the powder is super light and easily buildable. But sadly it has been discontinued as it has been replaced and I am looking to trying the newer version.
  8. MAC Paint Pots: These paint pots are great on there own blended out for a quick simple eye look, or use underneath as a base and to increase depth for a more dramatic look. I personally love Groundwork which is a warm taupe, it is a great base for a smokey eye. A few other choice colours are Indianwood, Painterly and Soft Ochre.
  9.  Smashbox Halo Highlighting Wand Gold: This is a light weight fluid highlighter which is a humectant so it keeps the skin hydrated as it attracts moisture to the skin. I use under foundation and apply across the cheeks bones, centre of forehead, chin and nose to give a super dewy glow to skin.
 10.  Anastasia Beverly Hills Dipbrow Pomade: This is the best brow product I have used. It is waterproof and doesn't smudge, the colour is rich and intense,a little goes a long way. Use it with a small fine angle brush to shape and define brows. It works on both full and sparse brows. I used to think I couldn't live without mascara but now I can't live without brows, specifically this product.
So I hope you liked the insight into a few of my most essential and everday products, but I do hope to try some new products in the near future, funds permitting. 
Lot of Love
A
x

Wednesday, 13 May 2015

The Big Day: I Do & I Dont's


Your wedding day is approaching so here is a few dos and dont's from me, to help you prepare and know what to expect when it comes to getting beautified before you say I do.

Skincare:

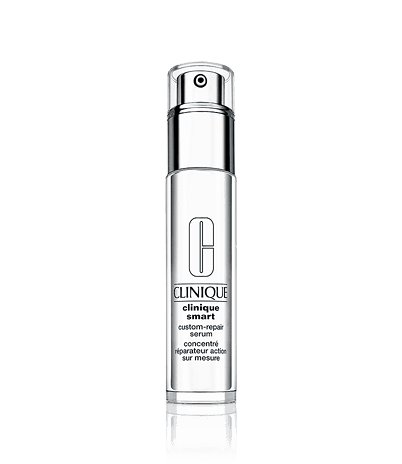
Please do not admit that your skincare routine consists of a make-up wipe, if it does get yourself down to your nearest chemist or beauty counter. Don't be afraid to talk to a consultant and find out which products best suit your skin. Personally I am a huge fan of Clinique products as they are all allergy tested and fragrance free, Clinique Smart Serum works wonders, if you want to a radiant glowing bride.


Trial:

I would always recommend a Bridal Trial as a must because everyone has they're own interpretations of natural make-up or a smokey eye. If you will be wearing false tan on your wedding day, it's a good idea to a tan trial if possible therefore your make-up artist can be fully prepared to match your foundation.

Make-Up:

Your make-up for the day should be a perfected version of you, your wedding day isn't the day to try a new look. If you have never worn eyeliner or a red lip you probably won't feel comfortable on the big day and looking back on pictures might regret your choice.

Bridesmaids:

Your bridesmaids should be prepared to do whatever you ask of them, after all it is your big day. They shouldn't refuse to wear the look you chose, request different make-up or go and alter the make-up after. So just be sure inform them of the look and what you say goes.


Timing:
 Allow extra time. You might be the most organised bride ever but be sure to allow extra time because you cannot be prepared for everything and something is bound to be forgotten or mislaid and more often than not someone will be late. Book Hair and Make-Up at the same time, if needs be they can work simultaneously or alternate between them.


Photography:

Allowing extra time will also give your photographer a chance to take some candid shots of you in the preparation stages and he or she might also have time pose some shots. Also be mindful of the rooms or area you are being photographed as these will be in the background of your wedding images.

If you're reading this in preparation for big day, I hope you have an amazing day and feel like the princess you dreamed of being as a child.


Same time next week!

Lots of Love,
A


Monday, 11 May 2015

Foundation Fact File.

Guess who has coffee and a full post's worth of make up chatter to get through? Yeah. Me. You guessed it. 

This week we're having a chinwag about foundation. Years of doing make up, and a few extra years of doing my own make up, have taught me that your foundation can make or break your look. It's also the major point of stipulation when it comes to a lot of make overs. Owing to the great passion that people have for their war paint I decided to do up a little guideline for those of you who are a bit lost when it comes to buying a foundation. 

I'll go through some common make up jargon (i.e the words that'll no doubt be hurled at you at some point when you're in store having a wander) and break them down so that the next time you need to invest the process won't be so daunting. 

Undertone; The undertone of a foundation is grouped as either warm, neutral or cool. "Warm" foundations have more yellow pigment in them, and "cool" toned products have more pink pigment. "Neutral", naturally enough, is somewhere in the middle. 
The undertone is usually the first hurdle that knocks people down. Some bases have more prominent pigments than others. As a rule of thumb, if the foundation looks grey or washed out you should try something warmer. If your foundation is coming across too yellow, or even orange, try something with a more neutral or cool tone. 

Formula; The formula is basically the way the product looks in the packaging, i.e liquid, powder, cream, etc. Different formulas have different benefits and strong points. For example a powder foundation is ideal for an oily skin type as it will absorb excess oil while you wear it. A richer liquid or cream product will be best for a drier skin as it will add a healthy sheen to the skin. 
Do a little research into the products you like the look of, as not all formulas stick to straight forward rules. There are some liquid foundations that work amazingly on oily skin and some powders that work nicely on dry skin. It all depends on the finish, which we'll cover next. 

Finish; When we talk about the "finish" of a foundation we mean how it looks on the skin. Matte, dewy and satin are all finishes. The finish isn't always determined by the formula, so as I said definitely do a little inside snooping to find out about some attractive products. 
A matte finish has no shine to it and gives a soft, powdered look to the skin. A lot of oily skin types like to go for this finish as many matte formulas will absorb excess oil and reduce unwanted shine. On the flip side we have drier skinned folk who like to add some faux glow. They might opt for a dewy finish which leaves the skin looking fresh with a sheen to it. Have a play with some foundations, ask some questions and see what takes your fancy!

Coverage; Oh, the Irish ladies are big into their coverage! Whether they like a light and sheer base or they want full on foundation, the Irish cailíns know their stuff! This is the one area that the Irish public has definitely educated themselves on, and brilliantly so. 
The coverage of a foundation determines how opaque the product is. Full coverage will completely obliterate your natural skin tone and replace it with your base colour. Medium coverage will show some texture and natural colour. Light coverage will show your skin and let it shine through while evening out the skin tone. 
One thing to consider here is whether or not you actually need a lot of coverage. One or two hormonal spots on your chin won't warrant a blanket of base across the gorgeous clear skin along your cheeks. Consider pairing your foundation with a concealer. Examine how your skin changes and behaves and let that help you in picking your foundation. 

So, armed with this knowledge, I hope that you guys and dolls have a little bit more confidence when it comes to picking out your new holy grail product. Buying a foundation can be one of the most influential purchases of your entire make up wardrobe, so I'm aiming to make it a little easier.There's a lot more that goes into creating the perfect foundation but with these four points under your belt you'll be fresh faced and fancy free in no time!

Don't forget to also follow us on twitter and Instagram, both of those are linked at the top of the home page. If you want us to see any of your posts tag us and hashtag "#ThreesCompanyBeauty"

I hope this was helpful guys!
Until next time,
J x 


Monday, 4 May 2015

The Essentials; The Brush Edition.

Monday? Check. Coffee? Check. Decaf at this hour, naturally. Another post? Check. We're in business.

Susan took up my usual haunt last Monday and did so beautifully, but I'm back this week with a post on some of my favourite brushes. These are the brushes I call on in any given situation, and the ones I think that you guys seriously need to invest in! Good brushes make all the difference when it comes to applying your war paint. 

It's a Bank Holiday Monday night so I'll keep this on the side of "Light Reading" and group these bad boys by Eyes, Skin and Lips. If anyone would like a more in depth review, just let me know and I'll throw together a lil' somethin'! For now, let's get cracking.


Eyes.


(brushes listed L-R)

Eco Tools Concealer Brush: A stiff, flat synthetic brush. Perfect for applying cream shadow. I also use this for under eye concealer, but I much prefer it for work on the eyelid.

Inglot 31T Brush: The very last word in angled brushes as far as I'm concerned. Razor thin and super precise, I love this for winged liner or for brows. The brush is flexible enough to create a soft, natural brow if needs be. 

Real Techniques Base Shadow Brush: An ideal brush to apply eye primer with. This blends cream or powder gorgeously. The brush won't absorb fluid products, making it perfect for cream products.

MAC 239: A flat brush made of goats hair. This is brilliant for packing shadow onto the eye with the best payoff. I also like this for shadow underneath the eye, as the top of the brush is thin and dense.

Inglot 6SS: A large blending brush for applying a light wash of colour, perfect for applying a contour shade into the crease. I start almost all of my eye looks with this brush to determine the space I'm working with. The 6SS is made of natural hair, so it's best for powder shadows.

MAC 217: The cult favourite. A small, oval shaped blending brush. The 217 can be used for larger areas or to add specific definition. Again this is better with powders in my experience as it is white goat's hair and can stain. I've used some popular alternatives for this brush but keep coming back to the 217.

CrownBrush C224: An oval shaped concealer brush. This is my go to brush for under eye concealer as it's dense enough to blend the product without reducing the coverage. The C224 is a basic brush I think every one should have, no one won't benefit form owning this guy.

Inglot 10S: A long, thin blending brush. This is perfect for smudging out eye liner or defining underneath the eyes as its shape keeps it really precise. I use this to create a really soft inner corner highlight as well. 

Skin.


(brushes listed L-R)

CrownBrush C435: A large, soft, angled brush. This brush blends powder bronzer over the face and neck quickly and easily without adding too much product. Plus it feels amazing on the skin!

CrownBrush C426: A huge duo-fibre brush with a domed head. I absolutely love this brush for blending powder products down onto the neck. If I have a client with a tan that doesn't quite match a shade in my kit I prefer to use a powder bronzer or foundation to match the neck as these are less likely to transfer onto clothes. This brush blends these products really softly for the most natural finish.

CrownBrush C466: A classic flat foundation brush. This is synthethic but incredibly soft. I get no streaky lines when I apply liquid products with this brush. Being totally honest, I was never a fan of this type of brush until I picked this one up. I now own three. That's how fabulous this is. 

CrownBrush C427: A smaller version of the C426, and more dense. You can be a lot more precise with this brush, I love this for applying a contour product with. Being duo fibre it works equally well with powders and creams. I own a couple of these as they work well for blush so I may use more than one at a time. 

Inglot 4SS: A large blending brush. This brush is so soft that I look for reasons to use this, just to feel it on my face! It's best for applying product in a specific area. I find this a little bit small for blush but I love it for specific contour or highlight placement. Despite being natural hair it works quite well with creams. 

Real Techniques Buffing Brush: If I'm in a rush, I pull out this guy. It blends product into the skin for a gorgeous natural finish. I use this with MAC Studio Fix Powder for easy coverage and even skin when I roll out of bed 25 minutes late. This is a Godsend. 


Lips.


(brushes listed L-R)

CrownBrush C463: An angled brush that's perfect for getting crisp lip lines. I love this for defining the outside of the cupid's bow. The edge is flat as opposed to curved so it does half of the work for you. 

Real Techniques Accent Brush: The tip of this brush is rounded, so I do love this for defining the curved bow of the lip. This is irreplaceable for me when it comes to doing dark, precise lip colours. I know this is marketed as an eye brush, but for me it's lips all the way. 

Face2 304 Lip Brush: I picked this brush up out of need rather than interest to be honest, but I ended up loving it. The brush is flexible enough to blend lip liner and lipstick together without losing control of the product. I also love this for touch ups. Once I have my shape defined, this brush fills the space really easily. 


I could go on from here, but I'll leave it at that. It's safe to say that these have become tools of my trade. If any of these become discontinued I'll have to hang up my brush belt for good! If you like the look of anything you see above, I've included links to some online shops below:

To purchase any of the CrownBrush items you can visit their online shop here.
MAC and Inglot brushes can be purchased from theie respective retail locations around Ireland. Inglot Ireland have an online shop, for their brushes you can click here. 
Real Techniques And Eco Tools retail in Boots in Ireland and can be purchased from the Boots website here. 
Face2 retail through Makeup Forever on Clarendon Street, Dublin. To purchase the Face2 Lip Brush through the Makeup Forever website, click here.

With all of that said, I'll leave it right there. As always, get in touch on our other social media locations. All of those are linked at the top of the blog. Blah,blah, blah, shameless plug and traffic driving through different platforms, you know the story by now...

Good night and God bless!
J x 


Monday, 20 April 2015

So you wanna blend in?

Good afternoon, folks!

It's Monday again and I'm firmly anchored in front of the keyboard with an ever faithful cup of coffee and another post for you guys.

This week I'll be going through four easy tips on blending powder products. They could be eye shadows, blushers, bronzers or highlighters, it's up to yourself. With the right techniques you can take make up from any price point and end up with a polished and perfected finish. It just takes a little bit of practice and the right steps. A bucket full of Nescafé Gold Blend is optional, but preferable in early morning scenarios. Anyway...

Tip #1. Set the area with a matte powder.


For the eyes I recommend using a matte shadow in a similar colour to your skin. For cheeks you can simply set the area with a setting powder of your choice. Even if you've primed the eye area, or used a matte foundation, there can still be areas where creams or liquids haven't fully set. These areas can cling to the product you blend over the top and leave them looking patchy and darker in certain areas. You only need a light dusting of matte powder to stop this from happening. Preping the area like this is the first step to getting your blending on the next level.

Tip #2. Use brushes that are different sizes and densities. 


This step is mostly applicable to the eye area as we tend to use more products there, but if you're like me and you have your heart scalded trying to soften the edge of a bronzer or blush then this might be up your alley! Using a larger and softer brush to apply your product first will give you a lighter finish and a cleaner edge. You can then use a smaller and denser brush to concentrate the colour where you want it most. 

Be careful not to put too much product on your brush to begin with. Start with a small amount of product and build up for a more polished finish. Using different brushes ties in perfectly with our next tip, which is...

Tip #3. Use a lighter "transition" colour . 


A transition colour is a tone that sits between the lightest and darkest shade you want to use. This step is the crucial step for making your blending look out of this world. When using eye shadow you can take two colours in the same family and buff the lighter colour onto the eye first. Follow up with your darker colour and you'll see it instantly diffuse and soften into the transition shade. On the skin, the most common way to do this is to use a bronzer or blush and follow up with a cooler, deeper colour to contour. 

Using a larger brush to apply your transition shade will blend the colour over a larger area. You can then use your smaller brush to go in and concentrate your darker colour in a specific area to add depth. 

Tip #4. Blend your textures!


When we talk about the texture of a product, we mean how it looks when it's on the skin (matte, dewy, frosted, satin sheen, etc.) Some eye shadows and blushes have a sheen to them. If you ever try them you'll probably have a really easy time blending them out. Products with a little shimmer in them tend to be easier to soften, so why not use this to your advantage? This step is optional and might not be everyone's cup of tea. If you want to take your make up one step further for an event then adding an element of sparkle will do the job rightly!

For this I'd recommend using your matte products first and following with anything that contains shine for a really perfected finish. Using a matte contour colour, a blush with a soft sheen and an illuminating powder highlighter gives the cheek such a gorgeous finish. On the eyes, layering a colour with some shimmer over the lid will soften the transition from a matte crease colour to a highlighted lid and tear duct area. 

While we're here I'd suggest avoiding products with any shine to contour the face or eye socket. Frosted colours reflect light and this goes against the purpose of contouring, but sure we'll cover that at some point in the future!


So my lovelies, those are my four essential techniques that I use every day, on every face, every time. You don't have to spend an unholy amount of time and money to get a decent finish, just practice and invest in some good tools and staple products that you can use day in, day out. The rest, mes amis, is up to you.

As always (I can hear one or two of you yawning because you know what's coming) feel free to give us a shout here, on Instagram or on our YouTube channel with any questions or queries that you have. 

Until next time,
J x 


Template by BloggerCandy.com | Header Image by Freepik